Minum Petang

Showing posts with label Minum Petang. Show all posts

Thursday, 2 April 2020

Talam Keladi Berlauk Daging ( Steamed Yam Cake In Coconut Milk)


It was my first experiment in making my homemade talam keladi berlauk aka steamed yam cake.
Apparently, there have been two versions of these kueh - the first one is the Chinese version of steamed yam cake, or they called as Taro cake.
Chinese version of steamed yam cake has no coconut milk (because coconut milk is not regular in most of Chinese dishes), usually added with Chinese sausages, Chinese mushrooms and the five spice powder.
The rest are pretty similar - with dried shrimp as the main seasoning and the cake batter is made using rice flour and a little bit of tapioca flour, corn starch and wheat flour to enhance its texture.
I actually enjoyed eating the Chinese version of steamed yam cake, the cake is stickier and savory - it is usually serve with spicy chili sambal and sweet black sauce (I'm not sure what is it called).

The second version - well, this is the version that I am going to elaborate further in this post, it is the steamed yam cake made with coconut milk.
This version of yam cake also uses dried shrimp as it's main seasoning, fried until fragrant and mix with fried shallots (bawang goreng), chopped green onions and chinese celery and sliced red chilies.
The yam is cubed and is either boiled until tender or stir fried until browned.
The cake batter preparation is almost similar with the first version, the only difference is that, coconut milk is added into this second version of steamed yam cake, making it sweeter and rich in nutty flavor.


I have no intention to make steamed yam cake when I bought two pieces of yam a few days back.
And the yams were left there in my fridge, untouched until a video of making steamed yam cake popped up in my recommended video lists in Youtube.
I was so excited to make it myself, thinking that it's not that difficult to be prepared.
Furthermore, this is going to be the first dish that'll be using the Chinese celery and green onion that I planted about two months ago in a vase in my balcony.
I just need to skip a few ingredients which I do not prefer to use for my steamed yam cake.
As I was preparing the ingredients, I was frustrated to learn that I have run out of the dried shrimp stock!  Arghh!! If only I noticed earlier, I should have bought it the day before.

So, I have to change my initial plan and make my steamed yam cake with minced beef instead of the dried shrimp.
It'll definitely taste different from the original version but to think it in a constructive way, this is going add a new twist into the dish, and a good option for those who don't like or is allergy to seafood.

Oh! Before I forgot, the texture for the steamed yam cake which made with coconut milk will not going to be sticky, unlike the Chinese version, since the fat coconut milk itself somehow helps to moisten the cake batter and I didn't add tapioca flour in it.
This cake is soft textured, but still firm enough to be cut into smaller pieces after it is completely cooled.
To complete the dish, I prepared two types of sauces, one is sweet and another one is spicy.
The sweet sauce is more or less like the Yong Tau Fu or Chee Cheong Fun sauce while the spicy sauce is pretty similar with the dim sum spicy dipping sauce.
The cake, as its name suggest, is to be steamed.
I use an 8"X 8" baking pan for this recipe, but you may also use a round baking pan or a casserole.

Lets get the nitty-gritty of this recipe.


TALAM KELADI BERLAUK DAGING
(STEAMED BEEF YAM CAKE IN COCONUT MILK)


Cuisine : Malay
Serve : 5 to 6


Ingredients:

500 grams of yam (cut into cubes)
200 grams of minced beef
3 cloves of garlic - chopped
1 teaspoon of white pepper powder
Approximately 5 tablespoons of cooking oil
Salt to taste
2 red chilies - sliced diagonally
1/4 cup of chopped green onions
1/4 cup of chopped Chinese celery
1/4 cup of fried shallots


For The Cake Batter:

2 cups of rice flour
1/3 cup of wheat flour
1/4 cup of corn flour
 1 1/2 teaspoons of salt
5 cups of coconut milk (I used 3/4 cup of coconut cream + 4 1/4 cups of water)


Instructions:

  1. Heat oil in a pan and fry the yam cubes until browned, remove and set aside.
  2. Using the same oil (add more if necessary), fry garlic until fragrant and slightly browned, add minced beef and season with white pepper powder and salt.  Fry until beef is opaque over medium heat.
  3. Turn off the heat and mix with sliced red chilies, chopped green onions and chopped Chinese celery.
  4. Next, in a large wok, combine rice flour, wheat flour, corn flour and salt.  Stir to combine.
  5. Pour coconut milk little by little while continue to whisk to avoid lumps formation.
  6. Cook the batter over low heat until it thickens (but not too thick) and  fold in fried yam and 1/3 of the beef mixture. 
  7. Pour the batter into the prepared pan greased with cooking oil.  Spread the batter with a spatula.
  8. Steam over medium heat for 45 minutes, or until inserted bamboo skewer comes out clean.
  9. Top the cake with the remaining beef mixture, light pressed down the topping with a spatula and steam for another 10 minutes.
  10. Remove from the steamer and let the yam cake cools completely before making an attempt to cut it. It should takes about 5 hours for the cake to completely cool.  You may pop it in the fridge, after 3 hours left at room temperature to accelerate the cooling process.
  11. Cut the cake with a sharp knife, soaked first in hot water to get nice, cleaned cut cake.  Or you may opt for plastic cake knife to cut the yam cake.


THE SAUCES


Ingredients for Sweet Sauce:

1/2 palm sugar (or 1 piece if you're using the smaller size)
1 1/2 cups of water
2 cloves of garlic - skin intact and crushed
2 tablespoons of sweet soy sauce
Salt to taste
1 tablespoon of corn flour (mix with 3 tablespoons of water)

Instructions:

Add palm sugar, water, sweet soy sauce and crushed garlic in a pot and bring the mixture to boil over medium heat.
Lower the heat and add the corn flour mixture.  Allow the mixture to simmer gently over low heat until it thickens to your desired consistency.  Season with salt.
Remove the garlic and ready to be served with the yam cake.


Ingredients for Spicy Sauce:

2 red chilies 
1 clove of garlic
3 tablespoons of dried chili paste
1 1/2 cups of water
3 tablespoons of white sugar
1 tablespoon of white vinegar
1/2 tablespoon of corn flour (mix with 2 tablespoons of water)
Salt to taste

Instructions:

Blend red chilies with garlic until smooth and pour in a pot.
Add water, dried chili paste, white vinegar and white sugar and bring the mixture to boil over medium heat.
Lower the heat, add corn flour mixture and allow it to simmer over low heat until it thickens.
Season with salt.
Ready to be serve with the yam cake.


Tuesday, 10 March 2020

Nugget Maggi @ Me Segera Mudah / Instant Noodles Nugget


Instant noodles is not only designed to be cooked using it's conventional way - that is..first - to bring water to boil, second - to add the seasoning and additional ingredients and last but not least - the noodles and an egg.

In Malaysia, instant noodles, with the most popular instant noodles brand - Maggi, instant noodles is modified into delicious snacks such as murtabak, or pan fried bread and nugget.
I've made instant noodles murtabak before, unfortunately, the snack is not to my hubby's liking as he prefers the original murtabak, made with minced meat or chicken and the classic murtabak flour pastry.

I made instant noodles nuggets a few days ago, but only now I managed to update it in my blog.
I've been busy in developing my new baking blog, which I specify to share my favorite cookies, cakes, muffins, cupcakes, Malay kueh, brownies, buns, breads and pastries.
All are to be written fully in Malay, since I was inconsistent with the language usage in this blog.
Please feel free to have a look at my new blog here.

I used the most popular instant noodles brand here which is Maggi.
Maggi has variety of instant noodles products such as chicken, curry, tom yam and asam laksa flavored noodles and also fried instant noodles.
Among all the flavors available, chicken and curry flavored noodles are our favorite.

Today's instant noodles nuggets recipe that I'll share is using the chicken flavored instant noodles.
You may use other flavors, but I would recommend to use curry flavored instant noodles as another option.
You may add scallion, chopped coriander or Chinese celery, chopped onion, diced carrot, shredded cooked chicken, minced chicken or minced beef, sausages and so on for additional textures and flavors in your instant noodles nuggets.


NUGGET MAGGI @ MEE SEGERA
INSTANT NOODLES NUGGET


Category : Snack
Serve : 2 -3


Ingredients:

2 packets of instant noodles (I used chicken flavored)
2 eggs
A pinch of salt (if necessary)
1 teaspoon of white pepper powder
2 sausages - cut into small chunks
1/4 carrot - diced
1/2 yellow onion - diced
2 cloves of garlic - finely chopped
Green onion - chopped - optional


For Coating:

4 tablespoons of corn flour (mix with 1/2 cup of water)
Bread crumbs (orange or white is fine)


Methods:


  1. Bring 3 to 4 cups of water to boil in a pot.  Add in the instant noodles (without the seasoning) and boil for three to four minutes, until soft.  Strain in a colander and set aside.
  2. In a large bowl, mix in the remaining ingredients, including the seasoning of the instant noodles.  Add in the cooked noodle and mix until well combined.
  3. Layer a sheet of baking paper or aluminium foil in an 8 x 8 inch baking pan (you may also use round baking pan), oiled the paper and the sides of the baking pan and spread the noodles mixture.  Gently press the noodles cake with a spatula to ensure it is compact.
  4. Steam the noodles cake over a medium heat for 30 minutes, until it is completely cooked.  Remove the pan from the steamer and let the cake cools completely.  You may pop the pan into the fridge once the cake is warm to fasten the cooling process.
  5. Cut the noodles cake into your desired size and dip each of the cake pieces into the prepared corn flour mixture (alternatively, you can use beaten egg) and coat with breadcrumbs.  Place the nuggets on a plate or arrange in an air-tight container if you want to freeze the nuggets.  For frozen nuggets, separate each layer with plastic or baking papers to prevent the nuggets from sticking together.
  6. To fry the nuggets, heat oil in a frying pan and fry the nuggets in several batches (do not overcrowd the pan to ensure nuggets evenly cooked) over medium heat until golden brown on all sides.
  7. Transfer the fried nuggets onto a paper towel-lined plate to absorb excess oil.
  8. Serve your nuggets immediately with dipping sauce of your choice.
  9. Enjoy!


Saturday, 15 February 2020

Puding Roti Blueberry Tanpa Telur (Eggless Blueberry Bread Pudding)


This is my first baked dessert that I prepared after quite some time.
Lately, I'm too lazy to prepare any dessert, mainly because we both have been consuming too much  cookies since before Chinese New Year.
Usually, whenever I wanted to sell new cookies products, I will bake at least two small batches for each product, where the second batch is usually baked to improve the outcome of the first batch's cookies by adjusting the ingredient's measurement.
Since most of my regular customers prefer less sweet and crunchy cookies, while expecting soft, melt-in-your-mouth and a bit sourish pineapple tart, all the hard work to do baking experiments paid off by thumbs-up from my customers.😉
I don't prefer to give my "experimented cookies" to anybody,so..we both have to finish them all, munching them piece by piece while watching our favorite TV shows.
(That's why I've never step on my weighing scale when there's a lot of cookies at my home because I'm going to freak out to see how many kg I've gained!) 😅

Bread pudding is a delicious dessert, even when enjoyed without the sweet sauce or toppings.
The classic version of bread pudding is the one topped with raisins.
In my previous posts, I shared two versions of my bread pudding - one topped with black raisins and the other one was a chocolate bread pudding topped with banana.
Eggy, milky, buttery and scrumptiously flavored and easy to be prepared dessert...this is all I can conclude about bread pudding.
To cook it, you may either use steaming or baking technique, but I usually would prefer to bake my bread pudding.
By baking, my bread pudding is more fragrant with crispy layer on top particularly when enjoyed warm.


This time I made different version of bread pudding, which is without the additional of egg.
It is suitable for those who are allergic to egg, and the fresh milk can always be substituted with vegan milks such as almond milk or coconut milk.
But for me, I'll still prefer using fresh milk for my bread pudding.
It turned out perfectly, moist and soft, milky and rich in blueberry flavor.

We love to enjoy our blueberry bread pudding when chilled, and it's richer in flavors when you keep your baked pudding refrigerated until the next day.
You may add a tablespoon of custard flour in the liquid mixture to add more flavor in the bread pudding.

Usually whenever I bake bread pudding, we'll enjoy it on the next day.
It is a fulfilling sweet dessert  that you can have it as your breakfast!


I baked my blueberry bread pudding individually in ramekin cups, but you may also use casserole or baking pan to bake your pudding.
I would recommend to use 8x8 inch baking pan, so the pudding would not have become too flat.
For this version, I used wholewheat bread.
You are free use any kind of bread, including croissant.
I haven't tried making my bread pudding with croissant before but I've seen croissant bread pudding recipes in Pinterest.
Croissant is not regular at our home since my hubby is not a fan of croissant.
You need extent the resting time if you're using croissant to get soft, dense bread pudding.
I used blueberry filling in this recipe, but may substitute with fresh blueberries.

Since this was my first successful trial of making my bread pudding without an egg, I am so excited to blog about this recipe.
Lets dive deeper into the details of the recipe.


EGGLESS BLUEBERRY BREAD PUDDING


Category: Dessert, Snack, Breakfast
Serve: 6


Ingredients:

10 slices of bread
2 cups of fresh milk
4 tablespoons of sugar
2 tablespoons of melted butter
1 teaspoon of vanilla essence
1 tablespoon of custard flour - optional

Topping:

Blueberry filling
Powdered sugar  (for dusting) - optional


Instructions:

Preheat oven to 200℃ or 392℉.

Cut the sliced bread into small cubes (or you can shred the bread with your hand) and place in a large bowl.  Set aside.

In a separate bowl, combine fresh milk, vanilla essence, sugar and custard flour (if using).  Whisk until the sugar dissolved.

Pour the liquid mixture in the bowl containing the cubed bread.  Mix and gently press down the bread with a spoon or spatula to immerse and soak the bread evenly.  Let the pudding mixture sit for 5 minutes.

Meanwhile, prepare 6 medium sized ramekin cups and grease each cup with butter.  Place the greased ramekin cups onto a baking pan.

Pour in the pudding mixture into the prepared ramekin cups until 3/4 full.

Top with two to three tablespoons of the blueberry filling and spread the filling evenly.

Bake in the preheat oven on the bottom rack for 40 minutes to 1 hour or until the bread pudding is set.  You may remove the pudding from the oven once you see a gap between the edges and the side of the cup.

Let the bread pudding cool on a wire rack.

Sift some powdered sugar on top of the pudding (optional) before serving.

Enjoy!


#NOTE#

Kindly ensure to let the blueberry bread pudding completely cooled before making any attempt to remove the pudding from the ramekin cup, I would suggest to let the pudding chilled first for at least 2 to 3 hours, until the pudding firm and hold it's shape.


Wednesday, 21 August 2019

Oat Banana Chocolate Chips Waffles


Waffles have become regular at my home, especially with added banana and chocolate chips.
They are not only delicious, the best part is the preparation is fuss-free.
I love to make ahead of time my waffles, to be serve as our breakfast on the next day.
We both favor to have waffles as our breakfast rather than having pan cakes.
It's simply because waffles have crispier exterior especially when eaten straight away after they are cooked or reheated.
On top of that, waffles have beautiful look, with deep, square-shaped pockets to hold toppings and syrup.
Imagine a fluffy, airy, crispy exterior waffle topped with sliced fruits, a scoop of ice cream then drizzle with chocolate syrup..
I guess nobody could not resist the temptation!
Imagining it immediately makes me hungry!😋😋

I have to admit that I have overindulge habits whenever I feel stress or moody.
Last time, I will prepare cakes, muffins and brownies to feed my cravings and seek pleasure from foods.
You know, over consuming sugar over the times can disrupt the metabolic functions and trigger the release of ghrelin, a hormone to increase our appetite, so we tend to eat more and more especially high-carbs and sugary foods.
Well, those were the day; when the red alarm hasn't struck my brain to change my eating habits.

I remembered that I bought a can of blueberry filling to make blueberry pie a month ago.
But I've changed my mind and I wanted to prepare something healthier, low sugar snack to satisfy my sweet tooth and making pie is definitely not a good option.
So, I made sweetener-free waffles to be eaten with already sugar-rich blueberry filling.


You can also add chia seeds into your waffles for additional fiber and nutrients.
Being as someone with poor metabolism, I suffer with frequent hunger strike, so, I need to always have ready-to-go snacks at hand to curb my hunger and to prevent overindulge in my next meal.
So, waffles always be one of my favorite snack option to cheer up my tummy instead of munching on junk foods which provide no other than empty calories.

Adding bananas into my waffles not only flavoring them with pleasant fruity flavor but also provide instant energy booster beneficial to kick start metabolism of the day when eaten as breakfast.
If you want to make a healthier lifestyle changes, it is very important to have breakfast.
Breakfast is the first meal of the day, to break a few hours of fasting when we sleep.
To ensure breakfast is satisfying, eat more nutritious foods, that is high in protein, complex carbohydrates such as oatmeal, whole wheat bread and waffle to help you feeling full longer and slow down your digestion process.
Next time I want to make plain whole wheat waffles and top with chicken, salad and cheese.

I've seen a lot of waffles recipes using melted butter to be incorporated in the batter mixture.
You can always opt for coconut oil for a healthier option.
If you prefer to make Belgian-style waffles, beat the egg whites separately with the yolks until soft peak, then fold them into the batter at the end.
But as I promised you, this waffles are easy to prepare and no mixer and a lot of utensils are required to prepare the batter, so you can even freshly prepare your waffles early in the morning.
Once again, this waffles are loaded with my favorite combination - banana and chocolate (chocolate chips) to enhance digestion, boost energy and mood.

If you're a fan of banana and chocolate, I would recommend you to make these waffles, and you'll definitely going to like them as much as I do.


OAT BANANA CHOCOLATE CHIPS WAFFLES


Course : Breakfast, Snack
Yield : 10 individual size waffles


2 large banana 
2 eggs - medium sized
1 3/4 cups of warm milk
1/4 cup of coconut oil/vegetable oil/melted butter
1/2 teaspoon of salt
1 tablespoon of sugar/honey
1/2 teaspoon of bicarbonate soda
2 teaspoons of baking powder
2 cups of white whole wheat flour/all purpose flour
1/2 cup of rolled oat
1/2 cup of chocolate chips


Instructions:


  1. Preheat your waffle iron.
  2. In a large bowl, mash bananas and add in oil, milk, sugar/honey (if using), salt.  Crack in eggs.  Whisk to combine.
  3. Add in the remaining ingredients and mix until well incorporated.
  4. When the waffle iron is hot, grease with little oil and pour in the batter and spread evenly.
  5. Cook the waffles according to your waffle iron instructions.
  6. Serve warm with your favorite garnish and topping.


#NOTE#

To see my notes on waffle's  storing and reheating tips, you can visit here: 

https://thelynalina.blogspot.com/2019/08/easy-whole-wheat-waffles.html

Friday, 16 August 2019

Cheesy Onion Tuna Bun


Tuna bun has become one of my favorite bun since I was still in my undergrad study.
Tuna bun has multiple variations - from the tuna filling to the shape of the bun itself.
For tuna bun filling, you can choose to simply mix the canned tuna with mayonnaise, and season with salt and pepper.
But if you would like your tuna filling with a touch of Asian flavors, you can add in chopped spring onion, garlic, large onion, pepper, salt and light soy sauce.
I love to eat tuna mayonnaise bun with large onion thinly sliced dressed on top of the bun.
Some of other tuna filling variations they add marinara or ketchup and fresh parsley.

Today I made tuna bun with mayonnaise, onion and parsley to be eaten as Mr Hubby's breakfast tomorrow.
Preparing breakfast especially during weekdays is always a frenzied rush.
That's why I always choose to make ahead of time and keep it refrigerated or frozen.
This tuna bun can last for two to three days when kept in room temperature and they can last longer when refrigerated.
But I wouldn't recommend to keep homemade bun for more than a week even if refrigerated because the texture won't be the same as when they are freshly baked.
Unlike certain cookies and cakes, such as chocolate banana cake or my favorite black forest cake, they have to be rested at least 12 hours to let all the flavors fused when we indulge them.


As for the shape of the tuna bun,  you can either pressed the dough ball to flatten the center part, creating a hole and fill with the tuna filling, or you can wrap the filling inside.
If you like your tuna to be juicy and moist, I would suggest you do the latter.

It was my first trial to make my own tuna bun and it was a huge success! 😄😄😄
I am so excited to blog about it.

I had to bake at 200℃ for 15 minute to help my bun having darker skin.
One lesson I learnt from my previous experience of baking bun is to use a higher temperature with a shorter duration to darken the bun, then reduce the temperature if necessary and bake for another 5 to 10 minutes to ensure the inner part cook completely.
Last time, I baked my buns at 180℃ but it took a longer time to make them darker.
The prolonged time caused my buns to get hardened.
Oh yes, I baked my buns in the center rack.
You need to do your own experiment in getting the best way to bake your buns so that they won't get stiffed, but instead, soft and fluffy.

You can substitute tuna with sardine if you're not a fan of tuna.
For me, tuna mayonnaise is the perfect combination as tuna can have a stinking/fishy smell, so adding mayonnaise can camouflage the strong taste.
For the bun, I referred to tuna bun recipe by Ninik Becker in Youtube.
I fall in love with how beautiful her tuna buns were and ever since I stumbled upon her channel, I 'd never looked back to search for other tuna bun recipes.
She is using all purpose flour for her tuna bun, but I prefer the combination of all purpose with bread flours in my bun.
All purpose flour add flavor and won't make my bun too light in texture.

So far, I've tried various canned tuna, but I would suggest not to use tuna that is already with mayonnaise.
Choose tuna flakes in water and add in your mayonnaise of choice.
I prefer Japanese mayonnaise, Kewpie as it's taste suite our preference.


CHEESY ONION TUNA BUN

Adapted From : Ninik Becker
Yield : 12

3/4 cup of warm milk
1 tablespoon of sugar
3 tablespoons of butter - melted
1 large egg 
1 teaspoon of salt
2 cups of bread flour
1 cup of all purpose flour
3 1/2 teaspoons of instant dry yeast
2 teaspoons of bread improver - optional


Tuna Filling:

1 can (150 gram) of tuna - drained
Chopped fresh parsley
3 to 4 tablespoons of mayonnaise
Salt to taste
Pepper to taste

Topping:

1 egg - beaten (egg wash)
Grated cheddar cheese
Large onion - thinly sliced

INSTRUCTIONS:

Using Bread Maker:

Add in all the ingredients according to the sequence that I listed as above and select the option "DOUGH" and wait until the machine finish kneading the dough.
Transferred the dough into a lightly grease large bowl, cover with cling wrap and let it rest for 45 minutes.

Using Stand Mixer:

Attach the dough hook to your stand mixer.
Add in flour, salt, sugar, yeast and bread improver (if using), mix at low speed until all are well combined.
Slowly add in butter, warm milk and egg and let the mixer continue kneading until a smooth dough formed.
Cover the mixing bowl with cling wrap and let it rest for 45 minutes.

Manual:

In a large bowl, combine all the dry ingredients (flour, bread improver, sugar, salt, yeast).  Mix well using a wooden spatula.
Slowly add in warm milk, melted butter and lightly beaten egg.  Mix until it forms a dough.
By using your hand, knead the dough until soft and elastic (just around 15 minutes).
Place the dough at the center of the bowl, cover with cling wrap.  Leave for about 45 minutes until risen and doubled in size.


PREPARING THE TUNA FILLING

Meanwhile, you can start to prepare the filling,
Combine tuna flakes (drained), mayonnaise and chopped parsley.  Season with salt and pepper.
Mix well and keep it refrigerated until ready to use.


MAKING THE TUNA BUN


Punch the proofed dough to break the air bubble.
Floured your work surface and transferred the dough onto it.


Flatten the dough and divide equally into 12 small portions.


Form small balls for each portion and cover with damp towel or plastic.
Let the dough balls rest for 15 minutes so they won't retract too much and easier to work on later.


After 15 minutes, place the dough into bread paper cups (if using) or on a greased baking pan.
Make sure you reserve enough space to let the bun rise further.
Flatten the center of each ball by tapping with the tip of your fingers to form a hole.
Fill with a spoonful of tuna filling and top with sliced onion.
Cover the buns with plastic and let them rest for another 20 to 40 minutes for second proofing.


BAKING THE BUN

The is the most exciting part! 
You can smell the delicious, tempted aroma of freshly baked bun.  😁😁😁

Preheat the oven at 200℃.


Brush the surface of the buns with egg wash and sprinkle with grated cheddar cheese.
You can sprinkle with more chopped parsley and pepper if you want.
Bake for 15 to 20 minutes in a center rack or until the tops are golden brown.
Let them cool on a wire rack.
Serve warm.


STORING THE LEFTOVER

Keep the leftover in an air-tight container and keep them far from heat exposure.
The buns can last for about 3 days when kept in a room temperature.
Reheat the buns in a microwave or bake at 160℃ until they warm to touch.


Wednesday, 7 August 2019

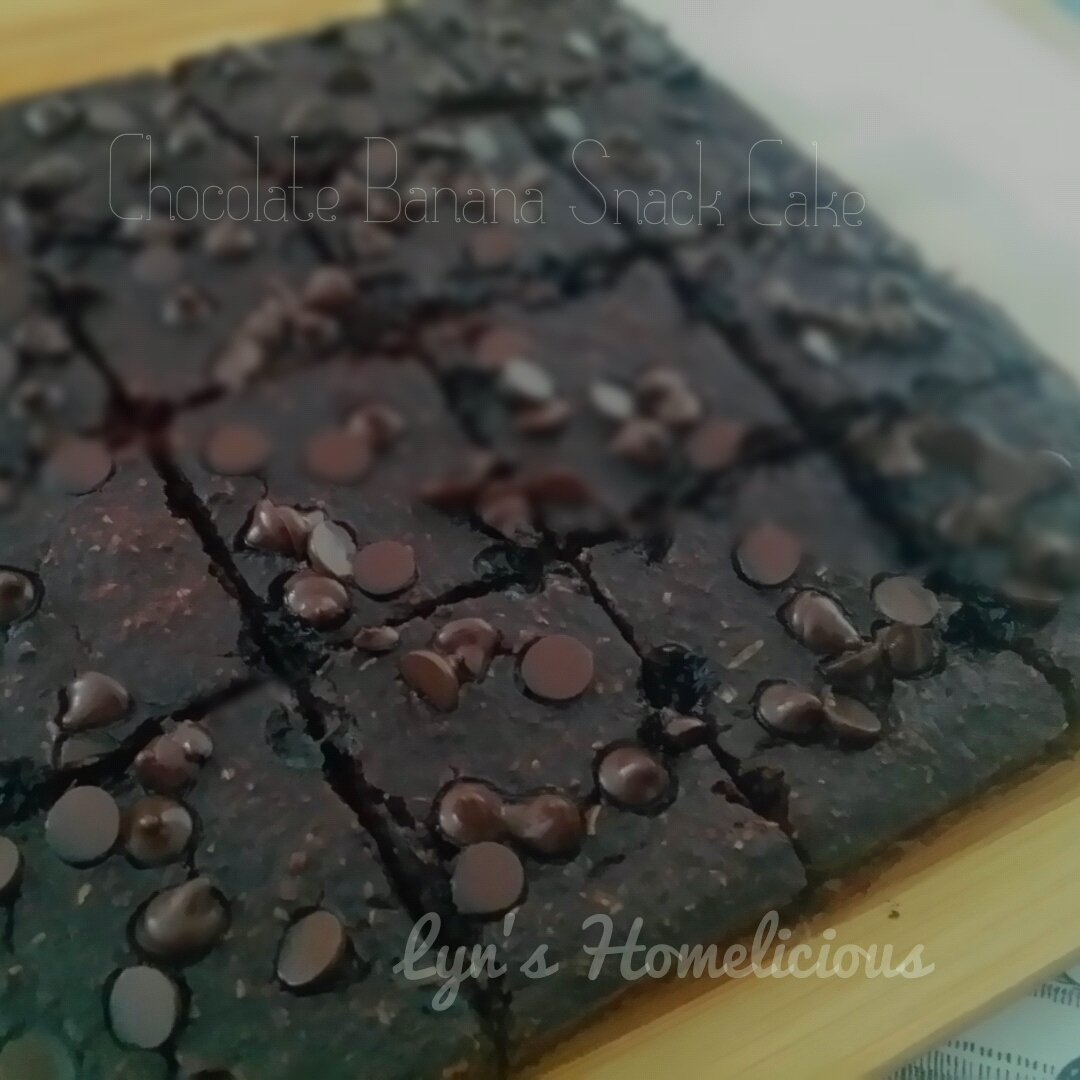
Chocolate Banana Snack Cake (Vegan)


Back in the day, chocolate banana muffins were so regular at our home when I was obsessed with my low carb diet program.
Well, those days are gone.
Thinking back those memories remind me of making them again, but into different version.

Chocolate banana snack cake is going to be one of my favorite sweet treat and will be regular in my house later on.
When you look at this cake at a glance,  it looks exactly like brownies.
It depends on how wide your cake pan is.
Use a smaller cake pan if you prefer it to be taller like typical cake's height.
It is rich in chocolate-banana flavors, with soft and moist in texture.
I made it yesterday and even though my cake was flatter than the original recipe (perhaps it was due to some adjustment of the ingredients.  Plus, I used a bigger cake pan), but it wasn't compromise the taste and in fact, it was so good and relaxing!

What's more, this cake is does not contains egg, so it is suitable for vegan and those who are allergy to it.
Frankly speaking, I've never made eggless cake before.
I was just afraid that my cake will be a complete disaster if I omit egg.
Egg provides stability to the cake's structure and by adding egg, it helps the cake to rise even more while enhancing it's flavor.
But this one is a total exception, because your cake is not going to be dense and hard as long as you add baking powder or baking soda and oil into it.
On top of that, the meshed bananas will help to soften and moisten the cake.
Just do not expect this cake will rise as much as when you add in egg into it.

I referred to the recipe from Katie to make this chocolate banana snack cake.
According to her, this cake is best to be prepared ahead of time as it tastes better on the next day.
I can't help but to have a try at that instant it was baked.
The cake was ambrosial, scented with mouth-watering aroma of cocoa powder and fruity flavor of ripened bananas.
It was perfect for almost any occasions.
And it do best for breakfast on the go too and as a quick tidbits.
My hubby is so fond of this cake and within a minute, he gobbled three slices without any interval between bites! 😅😅😅


The recipe called for granulated sugar, but I used honey as sugar substitute.
Honey is sweeter than granulated sugar, so make sure to reduce the amount when using.
To add it's nutritional value, I added two tablespoons of chia seeds.
These tiny seeds are enriched with healthy fat.
You can grind them to get the ground chia, but I prefer to add them in the raw form to add some crispiness in my cake.
Chia seeds are rich in fiber, so they would aid in your digestion.
If you are interested to learn more about how chia seeds can benefit your health, you can read my article on the benefits of chia seeds here.

The best part is, this cake, even having with just one slice, is sufficient to relief my hunger strike in between meals.
The secret is, you have to take time to chew your cake, enjoying every single bite whilst helping your digestive organs do their job at a more relax pace.
I was wonder if this cake would really taste better when I keep it to the next day like what Katie said in her post, so I had to hide a few slices and had them refrigerated.
This morning, before I had my main dish for my breakfast, I took out a slice to be eaten as appetizer.
And guess what, it did tasted even better!
It was richer in flavors.
You should try it yourselves.
Next time I'll double the ingredients and have them refrigerated for my sweet treats.


Chocolate Banana Snack Cake (Vegan)

Adapted From : Katie
Yield : 16 small slices

1 cup of white whole wheat flour
2 teaspoons of baking powder
1/4 teaspoon of baking soda
1/4 cup of unsweetened cocoa powder
1/4 teaspoon of salt
2 tablespoons of chia seeds
2/3 cup of water
2 tablespoons of natural honey
2 large overripe bananas - mashed
1/4 cup of coconut oil/melted butter/nut butter
1 teaspoon of vanilla essence
chocolate chips - optional

Methods:


Line a 8 x 8 square pan with baking/parchment paper.

Preheat oven to 180℃.

In a large bowl, add in all the dry ingredients (flour, baking powder, baking soda, cocoa powder, chia seeds) and whisk to combine.

Add in the remaining ingredients and mix well.

Pour the cake batter into the prepared pan and sprinkle chocolate chips on top.

Bake at center rack for about 30 to 40 minutes or until inserted wooden skewer comes out clean.

Let cool completely and cut into small slices.

Keep the leftover in an air-tight container and refrigerated.


#NOTE#

The recipe above is based on my own version of chocolate banana snack cake after doing few alterations according to my preference.  
For original recipe you may refer to Katie's blog in the link provided earlier.


Wednesday, 3 July 2019

Kek Mentega aka Butter Cake Dengan Blackcurrant


Assalamualaikum...

Sihat ke semua hari ni?
Sejak dua menjak ni ramai yang diseran penyakit batuk, demam dan selsema.
Begitu jugaklah dengan di sini..huhu...
Sejak dua hari lepas suhu badan Lyn dah mula turun naik, badan seram sejuk je..
Bila bangun pagi kerongkong ni rasa perit betul.
Alahai..ingatkan nak bertahan tak mau makan ubat tapi akhirnya kecundang jua.
Terpaksa jugak ambil ubat sebab tau mau sakit lama-lama.
Bila badan tak sihat mulalah asyik letih dan lesu je.
Nak tulis entry pun otak ni tepu je tak leh nak absord info lebih-lebih lagi bila buat entry untuk health blog Lyn.

Owh ya...kengkawan kalau rajin sudi-sudikanlah singgah di blog kesihatan Lyn di link ni yea 😉
https://wordpress.com/view/myhealthhypothesis.wordpress.com
Nanti Lyn bagi hadiah dengan berkongsi lebih banyak resepi menarik yea.. Hihi..

Petang tadi Lyn buat kek mentega atas permintaan bonda Lyn yang on the way ke rumah kami petang ni.
Dah lama tak datang rumah rindu nak ke rumah kami katanya.
Sambil tu anak dia yang kaki masak ni pun busy seharian siapkan kuih muih dan makanan kegemaran bonda.
Lenguh-lenguh bahu dan kejang-kejang kaki ni tunggang langgang kat dapur, tapi bila terbayang riak wajah gembira bonda yang happy makan makanan favorite dia terus jadi semangat.
Setakat sediakan makanan apa yang susah, sebab tu la Lyn suka masak sebab Lyn rasa happy kalau orang yang Lyn jamu makan tu suka dengan juadah yang Lyn sediakan.
Dulu pernah bercita-cita nak ambik kos culinary lepas habis SPM, pastu alih-alih sambung aliran sains jugak.
Takde rezeki nak jadi chef bertauliah so jadik chef amateur je la nampak gayanya,

Baiklah, berbalik pada topik kek mentega tadi.
Bonda Lyn ni suka kek mentega yang kosong je tanpa susu atau jus lemon.
Just mentega/marjerin, gula, telur, vanilla, tepung dan baking powder.
Tapi disebabkan Lyn ada stok blackcurrant kering, Lyn campurkan sekali dalam kek mentega tu.
Selalunya kalau buat Lyn suka pakai mentega SCS atau Anchor, tapi kali ni bonda pulak request nak kek mentega yang pakai marjerin jenama Adela.
Okay, request fullfilled.
Lyn sebelum ni belum pernah lagi beli marjerin Adela.
Ni baru pertama kali nak cuba.


Basic untuk kek mentega atau butter cake ni ialah untuk setiap sebiji telur Gred A, jumlah mentega, gula dan tepungnya ialah 50 gram.
Macam tu je.
So, kalau nak buat kek pakai 5 biji telur jumlah mentega, gula dan tepung yang diperlukan ialah 250 gram.
Okay, tersangat mudahkan macam ABC.
Kalau nak letak perisa oren ke, strawberry ke letak je esen.
Tapi kalau buat kek coklat tak boleh pakai formula ni tau.
Sebab kek coklat tu serbuk koko, jadi sukatan gula kena lebihkan kalau tak pahit pulak kek tu nanti.
Tambahan pula kek coklat biasanya memerlukan baking soda untuk menghitamkan warna kek tu.
Baking soda rasanya pahit sebab tu lah jangan sampai terlebih letak.


Tanpa membuang masa jom kita semak semula resepi.

Kek Mentega @ Butter Cake Dengan Blackcurrant

250 gram mentega/marjerin
250 gram gula halus - Lyn kurangkan sukatan ke 210 gram je
secubit gatam halus
5 biji telur Gred A
1 sudu teh esen Vanilla
1 1/2 sudu teh baking powder
250 gram tepung gandum
1/2 cawan blackcurrant kering


Butter cake - sebelum masuk oven


Panaskan oven bersuhu 180℃ selama 5 hingga 10 minit.

Alas loyang segiempat bersaiz 8x8 inch dengan baking paper dan sapukan sedikit mentega/marjerin.

Ayak tepung gandum dan baking powder.  Masukkan blackcurrant dan gaul rata.  Ketepikan.

Pukul mentega/marjerin dengan gula dengan kelajuan maximum sehingga kembang dan berkrim.

Perlahankan kelajuan mixer dan tuangkan esen Vanilla dan masukkan telur sebiji demi sebiji.

Pukul lagi dengan kelajuan maximum dalam 1 hingga 2 minit.

Masukkan adunan tepung sedikit demi sedikit dan kaup balik adunan menggunakan spatula.

Tak perlu gaul terlalu lama cukup sekadar kesemua bahan bercampur rata.

Tuang adunan ke dalam loyang dan ratakan menggunakan spatula.

Hentak perlahan sebanyak 3 kali untuk memadatkan adunan.

Taburkan baki blackcurrant di atas kek.

Bakar selama 1 jam 30 minit api atas bawah atau sehingga kek tak melekat bila dicucuk dengan lidi pencucuk.

Terbalikkan kek di atas redai dan tunggu sehingga kek sejuk baru dipotong.


#NOTA#

Untuk menghilangkan bau hanyir telur, seeloknya gunakan telur baru dan buang lendir yang melekat pada kuning telur.  Itulah punca bau hanyir tu.

Jangan buka tutup pintu oven sewaktu kek sedang dibakar.
Kalau nak check sama ada kek dah masak atau belum perlu tunggu selepas 30 minit baru boleh buka pintu oven.

Lepas tabur blackcurrant di atas kek, jangan hentak loyang kek lagi supaya blackcurrant tak mendap ke bawah sewaktu sedang dibakar.


Selamat Mencuba!