Home » Posts filed under High fiber recipes
Tuesday, 21 July 2020
Friday, 29 November 2019
Bread Maker Apple Carrot Bread
November 29, 2019 Lyn Alina
It's been so long since I've intended to bake a carrot bread.
In my second recipe, I added blackcurrants and butterscotch chocolate chips into my apple carrot bread.
It was awesome and a perfect combination of taste!
So, go on and experimenting on your carrot bread, alright! ๐๐
1/3 cup of black raisins/blackcurrants - optional
1/3 cup of butterscotch chocolate chips - optional
- Add the ingredients in the bread maker machine according to the direction provided by manufacturer. I added the ingredients according to the sequence as I listed above. For the bread flour, begin with adding 1 and 1/3 cups first.
- Select the menu basic/ white bread and press "Start." As the machine is mixing the dough, monitor the process and add more flour little by little if the dough is too slack, as the apple and carrot release their juices. Stop adding flour once the dough forms a smooth ball and no longer stick to the bread pan.
- Add in raisins and butterscotch chocolate chips (if using) when the machine signals for Raisins/Nuts addition, which is usually 5 or 10 minutes before the end of kneading cycle.
- Wait until the machine finished baking the bread.
- Once completed, detach the bread pan from the machine. Be careful and do not touch the pan handle bare hand, wear a glove and then flip the pan onto a wire rack to cool the bread completely.
- Slice the bread with a bread knife according to the desired thickness.
- Store the bread in an air-tight container or zip lock bag and refrigerated for longer life span.
- To reheat, you may steam the bread, or wrap the bread in aluminium foil and microwave for 2 minutes or bake in oven at 150℃ for 10 minutes or until the bread is warm enough.
1/3 cawan kismis hitam/blackcurrant - tambahan
1/3 cawan butterscotch chocolate chips - tambahan
- Campur kesemua bahan dalam mesin bread maker mengikut aturan yang diberikan. Saya masukkan bahan-bahan mengikut senarai di atas. Untuk tepung roti, mulakan dengan mencampurkan 1 1/3 cawan tepung dahulu.
- Pilih menu "basic/white bread" dan tekan "Start." Semasa mesin sedang mengadun adunan, sentiasa pantau dan jika adunan terlalu lembik (adunan melekat pada loyang roti), tambah tepung roti sedikit demi sedikit hingga doh menjadi kental dan berbentuk bola yang licin.
- Masukkan kismis dan butterscotch chocolate chips (kalau menggunakan) bila mesin mengeluarkan signal Raisin/Nut, iaitu 5 ke 10 minit terakhir untuk proses menguli.
- Tunggu sehingga mesin selesai membakar roti.
- Setelah roti siap dibakar, keluarkan loyang roti dari mesin (gunakan sarung tangan) dan terbalikkan loyang roti di atas redai untuk mengeluarkan roti dan biarkan sejuk.
- Potong roti menggunakan pisau pemotong roti mengikut ketebalan yang dikehendaki.
- Simpan roti di dalam bekas kedap udara atau zip lock bag dan boleh simpan di dalam peti sejuk supaya roti tahan lebih lama.
- Untuk panaskan roti, boleh gunakan kaedah kukus, bakar menggunakan bread toaster atau bungkus roti menggunakan aluminium foil dan panaskan menggunakan microwave selama 2 minit atau ketuhar pada suhu 150℃ selama 10 minit atau sehingga roti cukup panas.
Thursday, 21 November 2019
Coconut Flour Oat Chocolate Chips Soft Cookies
November 21, 2019 Lyn Alina
I'm still on my way to adapt a healthier lifestyle and to eat healthy.
I'm now adapting a low carb diet, not only to lose my weight but also to keep my body fit and healthy.
Prolonged high blood sugar can cause a number of health conditions and increase inflammation in our body.
Inflammation is associated with the occurrence of many chronic illnesses.
The biggest challenge when adapting a low carb diet is when it comes to sweet treats like cake and cookies.
Actually, I've reduced the intake of sugary foods and beverages since two years ago.
I still eat cake and cookies sometimes, when I crave to indulge sweet treats.
Since we both now prefer to eat less sugar in our diet, we rarely buy cake and cookies from outside.
By making them on my own, I can control the sugar or the sweetener content, and to substitute the ingredients for a healthier options.
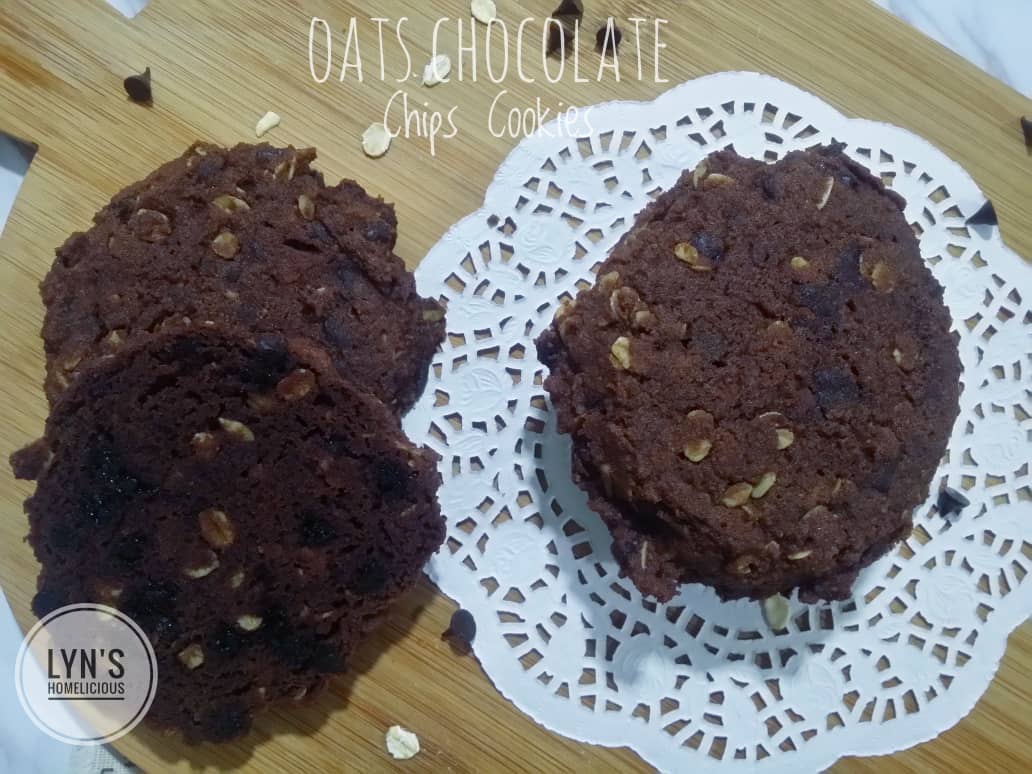
These chocolate chips cookies are made with coconut flour with additional rolled oats.
This is my first trial to use coconut flour, and I'm still haven't get use to the right portion when using coconut flour since it absorbs liquid more than the regular all purpose flour or even almond flour.
From the information that I found in few blogs, when we substitute normal flour with coconut flour, we need to reduce the coconut flour portion, or add more liquid and butter.
So, the cookies won't be too dry and hard.
Honestly, I am a bit excited to about sharing my recipe today since this is my first baking experiment using coconut flour.
I'm curious on how my chocolate chips cookies taste like and how is the cookies texture.
So what is the outcome of my cookies?
My cookies turned out to have a soft texture and a little bit dense than wheat or all purpose flour.
They are yummy and bursting with flavors!
When you eat them freshly baked, these chocolate chips cookies are crisp on the outside and soft and chewy on the inside.
I think for my next low carb chocolate chips cookies, I will try to mix between almond and coconut flour to see what is the outcome of my cookies.
But right now, I'm happy with my coconut flour chocolate chips soft cookies, and the richness of coconut flavor and natural sweetness that it has in coconut flour, make it a good option for baking.
I used brown sugar in my cookies but I reduced the amount.
I don't have low carb sweeteners at my home like erythritol, xylitol and stevia, and I'm planning to buy one since I love to bake.
I made my cookies bigger, as I used the ice cream scoop.
This cookies is yummy even my hubby likes to munch on it.
I made these for my post work out treat that's why I made my cookies larger in size.
One piece of cookies for my one hour of workout session.
Nowadays, I prefer to munch on snacks which satiate myself to avoid overindulge in my next meal.
Coconut flour is high in fiber, that is not only helps to keep you feel full longer, but also may help to keep your blood sugar in check.
It is gluten free and a perfect option for those who are allergic to gluten.
So, if you're bored of snacking on fruits, maybe you can add a new twist in your diet and bake these cookies for your snacks.
The best thing is, this cookies is also perfect as your breakfast to go.
Just pack in two to three pieces of these cookies and you can have them on your way to your work place.
You can make the cookies size smaller, so you can get more in quantities.
I keep my cookies chilled because I like the taste more when eating straight from the fridge.
These cookies will no longer be crisp on the outside once cooled.
They will be soft, like a chewy cake.
Instructions:
- Preheat oven to 180℃. Line a baking pan with parchment paper or silicone mat.
- Spread rolled oats on a baking pan and bake for 2 minutes and cooled.
- In a large bowl, combine butter and sugar, whisk to combine. Then add in eggs and vanilla essence and mix well.
- Sift in cocoa powder and baking soda. Add in coconut flour.
- Lastly, fold in chocolate chips and cooled rolled oats.
- Drop a small portion of cookie dough onto the prepared baking pan, leaving space 3 cm apart. You may use ice cream scoop. Flatten the each cookie dough with your hand.
- Bake in the center rack for 15 to 20 minutes, until cookies are set.
- Once baked, remove the pan from oven and let the cookies cool slightly on the baking pan as the cookies are very fragile when hot. Transfer onto the wire rack once the cookies firm and let cool completely.
- Store the cookies in an air tight container and keep the container away from direct heat, refrigerated is better.
Cara-cara:
- Panaskan oven pada suhu 180℃. Alas dulang pembakar dengan kertas baking atau silicone mat.
- Bakar sebentar rolled oats selama 2 minit dan sejukkan.
- Di dalam mangkuk pengadun, satukan mentega dan gula. Kacau rata menggunakan whisk. Kemudian, masukkan telur dan esen vanilla. Kacau sebati.
- Ayakkan serbuk koko dan baking soda dan gaul rata.
- Masukkan tepung kelapa, coklat chips dan rolled oats yang telah dibakar tadi.
- Sudukan adunan ke atas dulang pembakar yang telah disediakan, jarakkan lebih kurang 3 cm antara satu sama lain. Boleh juga menggunakan scoop ais krim. Leperkan sedikit doh menggunakan tangan.
- Bakar pada rak tengah selama 15 ke 20 minit atau sehingga biskut masak.
- Bila biskut telah masak, keluarkan dulang dari oven dan biarkan biskut sejuk sebentar di atas dulang pembakar kerana biskut terlalu lembut bila panas. Pindahkan biskut ke atas redai dan biarkan sejuk.
- Simpan biskut di dalam bekas kedap udara dan boleh jugak disimpan di dalam peti sejuk.
Thursday, 19 September 2019
Easy Sweet Potato Crust Quiche
September 19, 2019 Lyn Alina
It's been quite some time since I've updated entry on egg-based breakfast idea.
Lately, our breakfast has been much simpler, since I've always make ahead of time most of our breakfast menu like waffles, steamed buns, buns, burger and so on.
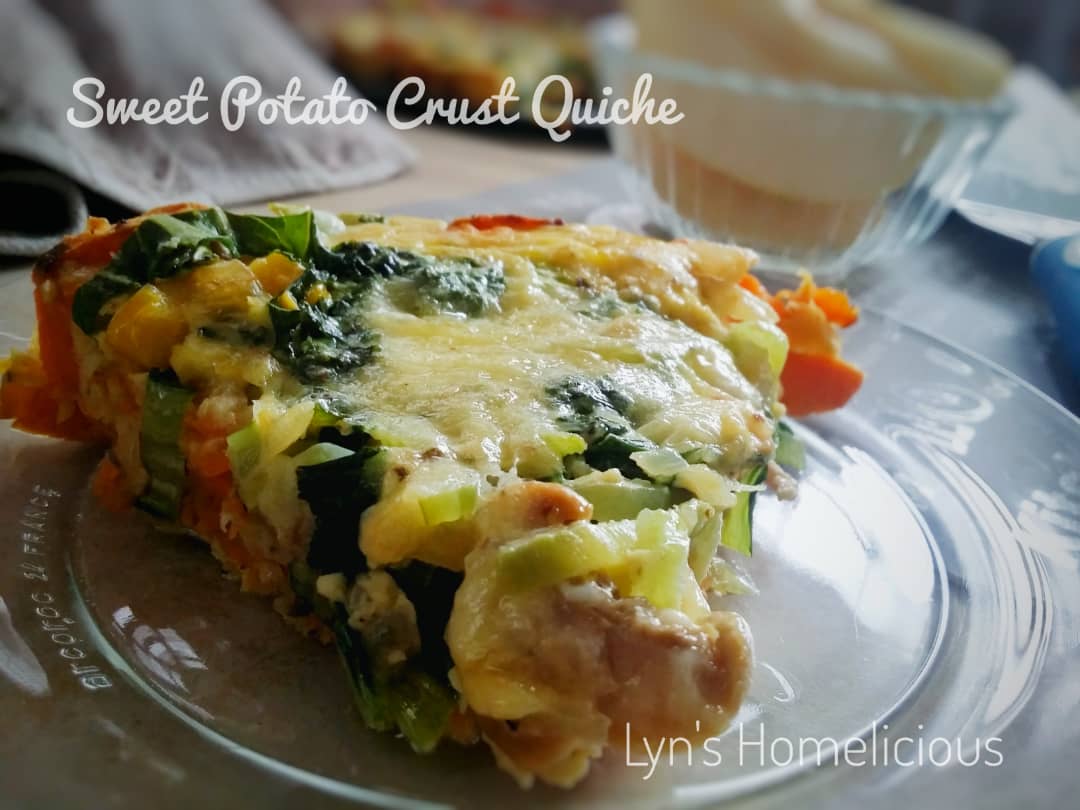
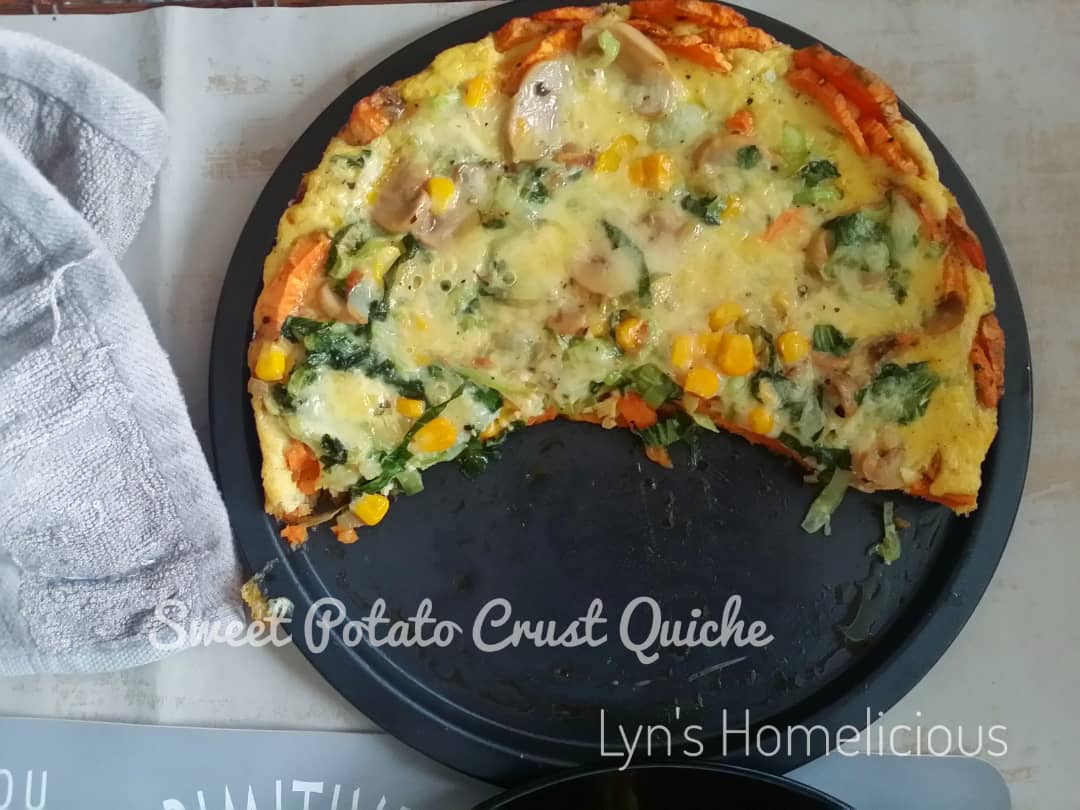
I made quiche for our breakfast yesterday, with sweet potato as the crust.
I have three large sweet potato to finish, one of them is finished for making the crust of my quiche.
While making crust out of sweet potato usually required us to boil and mash them first, before it is incorporated with flour to form a dough, then flatten and press onto the pie pan, this version of sweet potato crust is much simpler.
All you have to do is to thinly slice your peeled sweet potato, season with pepper, salt and olive oil and arrange at the base and the side of the pan.
Bake them until they are soft and begin to crisp.
So, on top of it's fuss-free preparation, this version of sweet potato crust is amazingly delicious, without additional flour.
So, it is gluten free version of quiche.
Quiche is a versatile English style breakfast and snack - it can be topped with savory or sweet filling.
The filling is usually made of egg custard - a mixture of egg, milk and salt.
If you're making quiche with sweet filling, additional sugar may need to be added in the egg custard.
I added three types of vegetables in my quiche - kernel corns, button mushrooms and pak choi, or Chinese cabbage.
You can use spinach, capsicum and meat in your filling, up to your creativity.
For additional cheesy and milky flavors, you can add shredded cheese in the egg custard and sprinkle some on top of the filling to intensified the cheesy flavor before the final baking process.
This quiche is perfect for breakfast, as it is loaded with protein, fibers and vitamins and it helps you to feel full longer.
It can be make ahead of time, refrigerated for up to few days.
The preparation consists of three processes - first is to prepare the sweet potato crust.
Roasting the sliced sweet potato in a pie pan takes at least 20 minutes to set.
So, in the meantime, you can start preparing the sauteed vegetables and egg custard.
It took approximately one hour to prepare this sweet potato crust quiche.
So, if you plan to freshly make your quiche for breakfast, be sure to prepare it at least one hour earlier before your breakfast time.
All I can say is, this quiche is absolutely comforting!
With the sweetness of the sweet potato, combine with milky, cheesy and savory taste of the filling is totally heaven.
Even when we eat the refrigerated leftover on the next day (and of course is reheated first), the taste is still delicious and fresh.
Let's get down to the nitty-gritty of making the quiche.
Wednesday, 21 August 2019
Oat Banana Chocolate Chips Waffles
August 21, 2019 Lyn Alina
Waffles have become regular at my home, especially with added banana and chocolate chips.
They are not only delicious, the best part is the preparation is fuss-free.
I love to make ahead of time my waffles, to be serve as our breakfast on the next day.
We both favor to have waffles as our breakfast rather than having pan cakes.
It's simply because waffles have crispier exterior especially when eaten straight away after they are cooked or reheated.
On top of that, waffles have beautiful look, with deep, square-shaped pockets to hold toppings and syrup.
Imagine a fluffy, airy, crispy exterior waffle topped with sliced fruits, a scoop of ice cream then drizzle with chocolate syrup..
I guess nobody could not resist the temptation!
Imagining it immediately makes me hungry!๐๐
I have to admit that I have overindulge habits whenever I feel stress or moody.
Last time, I will prepare cakes, muffins and brownies to feed my cravings and seek pleasure from foods.
You know, over consuming sugar over the times can disrupt the metabolic functions and trigger the release of ghrelin, a hormone to increase our appetite, so we tend to eat more and more especially high-carbs and sugary foods.
Well, those were the day; when the red alarm hasn't struck my brain to change my eating habits.
I remembered that I bought a can of blueberry filling to make blueberry pie a month ago.
But I've changed my mind and I wanted to prepare something healthier, low sugar snack to satisfy my sweet tooth and making pie is definitely not a good option.
So, I made sweetener-free waffles to be eaten with already sugar-rich blueberry filling.
You can also add chia seeds into your waffles for additional fiber and nutrients.
Being as someone with poor metabolism, I suffer with frequent hunger strike, so, I need to always have ready-to-go snacks at hand to curb my hunger and to prevent overindulge in my next meal.
So, waffles always be one of my favorite snack option to cheer up my tummy instead of munching on junk foods which provide no other than empty calories.
Adding bananas into my waffles not only flavoring them with pleasant fruity flavor but also provide instant energy booster beneficial to kick start metabolism of the day when eaten as breakfast.
If you want to make a healthier lifestyle changes, it is very important to have breakfast.
Breakfast is the first meal of the day, to break a few hours of fasting when we sleep.
To ensure breakfast is satisfying, eat more nutritious foods, that is high in protein, complex carbohydrates such as oatmeal, whole wheat bread and waffle to help you feeling full longer and slow down your digestion process.
Next time I want to make plain whole wheat waffles and top with chicken, salad and cheese.
I've seen a lot of waffles recipes using melted butter to be incorporated in the batter mixture.
You can always opt for coconut oil for a healthier option.
If you prefer to make Belgian-style waffles, beat the egg whites separately with the yolks until soft peak, then fold them into the batter at the end.
But as I promised you, this waffles are easy to prepare and no mixer and a lot of utensils are required to prepare the batter, so you can even freshly prepare your waffles early in the morning.
Once again, this waffles are loaded with my favorite combination - banana and chocolate (chocolate chips) to enhance digestion, boost energy and mood.
If you're a fan of banana and chocolate, I would recommend you to make these waffles, and you'll definitely going to like them as much as I do.
Instructions:
- Preheat your waffle iron.
- In a large bowl, mash bananas and add in oil, milk, sugar/honey (if using), salt. Crack in eggs. Whisk to combine.
- Add in the remaining ingredients and mix until well incorporated.
- When the waffle iron is hot, grease with little oil and pour in the batter and spread evenly.
- Cook the waffles according to your waffle iron instructions.
- Serve warm with your favorite garnish and topping.
#NOTE#
To see my notes on waffle's storing and reheating tips, you can visit here:
https://thelynalina.blogspot.com/2019/08/easy-whole-wheat-waffles.html
Monday, 5 August 2019
3 Ingredients Chocolate Banana Ice Cream (Vegan, Gluten Free)
August 05, 2019 Lyn Alina
- In a bender or food processor, put in the frozen banana chunks and add in milk. Pulse until smooth.
- When the mixture is smooth, add in cocoa powder and honey (if using) and blend until all the ingredients are well incorporated.
- Transfer the mixture into a container and put back in the freezer for at least an hour.
- When the ice cream is solid and scoopable, serve immediately.
Sunday, 4 August 2019
Easy Whole Wheat Waffles (With Storing & Reheating Tips)
August 04, 2019 Lyn Alina
As I began to shift towards practicing a healthier lifestyle, my inner desires push my cooking creativity a step further, into making a more nutritious, wholesome dishes.
I still remember those days where my hubby and I enjoyed having awfully delicious chocolate vanilla waffles with a scoop of chocolate mint ice cream on top at Gelare, a desserts-only cafe in Damansara.
The waffles were crispy on the outer while the inner part was fluffy and spongy.
That's the perfect waffle's texture that every waffle lovers wish to indulge!
It's been quite some time since the last time I remembered I was making waffles.
Waffles, even though it's one of my favorite breakfast and dessert options, just because I've grown up without much exposure to eating waffles, they're always been out of my cooking lists.
Waffles are versatile breakfast option especially in Western countries.
They can be eaten with almost anything, not limited to butter and maple syrup.
If you are having sweet tooth like me, you can top your waffles with fresh fruits, fruit jams, chocolate or peanut butter spreads.
Savory toppings worked well on waffles too!
Next time I'll definitely top my waffles with salad and grilled chicken.
I made whole wheat waffles yesterday when my hubby was on his off day, to be eaten with strawberry and chocolate hazelnut spreads.
I still have a packet of fresh strawberry and a small bunch of bananas in my fridge that I can topped on my waffles.
By following exactly on the recipes of 100daysofrealrood, my waffles turned out perfectly as I wanted!
For vegan, I'm not sure if you could find the perfect substitute for egg as I haven't tried any egg substitute before.
The original recipe called for melted butter.
But if you are allergy to dairy products - such as butter and milk, you can opt for plant-based oil such as vegetable oil, corn oil, olive oil or coconut oil.
I used coconut oil to replace butter and almond milk as a substitute of a regular dairy milk.
It was my first time I made whole wheat waffles and they were a big hit to us!
I'll surely be making these waffles again and keep them frozen.
I was so excited to make my first whole wheat waffles that I forgot to carefully read the instructions.
Wet ingredients (milk, honey, melted butter/oil and eggs) were supposed to be added first and whisk to combine then followed by the dry ingredients.
I did it the other way around.
Luckily that did not affects my waffle's outcome.
So, you can either mix the wet ingredients first then add in dry ingredients or alternatively, mix the dry ingredients first then pour in the wet ingredients.
1/2 teaspoon of cinnamon powder (optional)
Methods:
- Preheat waffle iron and grease the surface with oil.
- In a bowl, add in flour, baking powder, cinnamon powder, baking soda and salt. Whisk to combine.
- Add in almond milk, coconut oil and crack in the eggs. Mix well until all the ingredients are well incorporated and lumps are disappeared.
- When the waffle iron is hot, by using a small ladle, pour in about 1 to 1 1/2 of the batter and spread evenly.
- Cook the waffles according to the instructions that came along with your waffle iron, or until it turned brownish and crispy.
- Serve warm with your favorite toppings.
- By using oven - Reheat your waffles about 7 to 8 minutes at 180℃ or until the outer layer is crispy.
- By using microwave - Reheat your waffles for 30 to 60 sec, depends on whether you're reheating a frozen or refrigerated waffles, or until they feel warm to touch. Waffles won't turned crispy if your reheat using microwave.
- By using toaster - You can use this method if the slots on your toaster is wide enough. It'll make your waffles crispy on the outside.
- By using waffle iron - I prefer this method to reheat my waffles. Put your waffles back inside the waffle iron and reheat until the outer later is crispy.
Tuesday, 2 April 2019
Egg Based Breakfast Idea 3: Triple Layer Egg In Bread
April 02, 2019 Lyn Alina
If you're looking for a different way of using bread and egg to make your breakfast, these triple layers egg in bread is one of the perfect option! They are made of 3 layers of bread of choice, drizzled with bolognese sauce, sprinkled with grated cheddar cheese and top with an egg.
Actually, I don't have any idea how to name these satisfying cheesy, rich in pizza flavored egg based breakfast. I finally decided that these dish is better be named as it is - the triple layers egg in bread!
I made this for our today's breakfast. I had store-bought white wholemeal bread that was still not yet finished, as we both don't prefer to eat them with jam or nutella and peanut butter spread. The loaf must be turned into something else - such as bread pudding, egg muffins with read, fried egg bread or "roti telur" , sardine rolls, sandwiches or to be eaten with savory gravy such as chicken curry, sardines spicy gravy (sambal) or spiced fava bean (kacang pool). But the point is, they will never be eaten alone or even with any kind of spreads!
If you follow my blog, you'd know that I've been on an egg based breakfast idea over the past few months. I always love to have egg in my breakfast and instead of the traditional plain egg sandwich and half-boiled egg, I would prefer something with more color and flavor! If you're of my type, you would undoubtedly happy to have these as your breakfast. Trust me..
The idea of the making is pretty simple as its name - you have to make a hole in the center of your bread and later you'll crack in the egg in the hole. Need not to be stress of making the perfect one because it is a freestyle - you're going to use your own creativity to decorate them yah! And instead of making a hole, you would probably just use a small round shape bottle lid, which is about the size of the egg ring and press it down at the center of the bread to flatten the area. If you prefer the latter, I suggest its best to use thicker bread slice so that the height is sufficient enough or unless the egg will spill to side. These amazingly delicious egg in bread aren't taking so much time to prepare and you are free to decorate them with your ingredients of choice to make them look more appetizing and luxurious!
I don't have large round shaped cookie cutter, so I used the lid of my mini grinder to create the hole at the bread. Alternately, you may also place a small plate at the center of the bread and cut along the shape of the plate by using a sharp knife.
For healthier version, replace white bread with wholewheat bread to give you full satisfaction of your hunger with more fiber intake.
- Preheat oven at 160ยบC or 320ยบF.
- Create a hole at the center of a slice of the bread by using large cookie cutter/ round shaped bottle lid.
- Grease the baking tray with vegetable oil/ melted butter. (If you have baking or parchment paper you can place them on the baking tray.
- Place a slice of bread on the tray, spread a bout a tablespoon of bolognese/marinara sauce on top. Then place the onion slices on top and covered the bread surface with shredded cheddar cheese.
- Put another slice of bread on top and repeat step 3.
- Place the bread slice with the hole in the center on top. Spread bolognese/ marinara sauce on the bread surface. Lastly, crack an egg in the bread hole. The egg may spill a little bid but don't freak out because this is quite normal. Just make sure not to use a large sized egg unless the hole you make is big enough.
- Lastly, sprinkle some crushed black pepper, parsley flakes and salt on top of the egg.
- Bake for about 30 minutes until the white egg is set. Serve immediately.
![]() |
| Step 1: Make a hole at the center of 1 slice of bread |
![]() |
| Step 2 : Spread the first layer with sauce and sprinkle with sliced onion and shredded cheddar cheese |
![]() |
| Step 3 : put the second layer of the bread on top of the first layer |
![]() |
| Step 4 : again, spread with sauce and sprinkle with sliced onion and shredded cheddar cheese on top |
![]() |
| Step 5 : place the bread with the hole on top |
![]() |
| Step 6 : spread sauce on the bread surface, crack in an egg in the bread hole and sprinkle with salt, crushed black pepper and parsley flakes on top |