Vegan

Showing posts with label Vegan. Show all posts

Wednesday, 7 August 2019

Chocolate Banana Snack Cake (Vegan)


Back in the day, chocolate banana muffins were so regular at our home when I was obsessed with my low carb diet program.
Well, those days are gone.
Thinking back those memories remind me of making them again, but into different version.

Chocolate banana snack cake is going to be one of my favorite sweet treat and will be regular in my house later on.
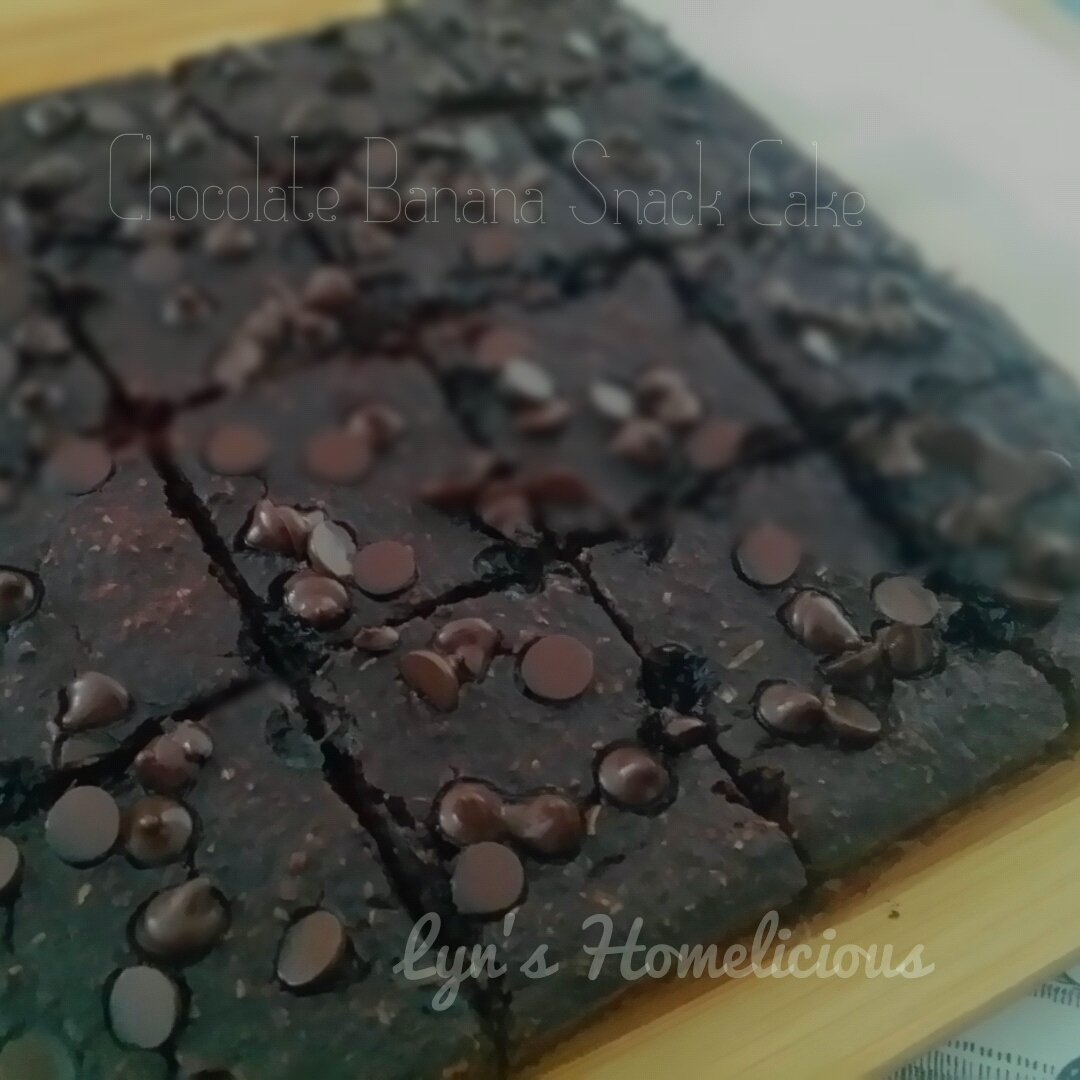
When you look at this cake at a glance,  it looks exactly like brownies.
It depends on how wide your cake pan is.
Use a smaller cake pan if you prefer it to be taller like typical cake's height.
It is rich in chocolate-banana flavors, with soft and moist in texture.
I made it yesterday and even though my cake was flatter than the original recipe (perhaps it was due to some adjustment of the ingredients.  Plus, I used a bigger cake pan), but it wasn't compromise the taste and in fact, it was so good and relaxing!

What's more, this cake is does not contains egg, so it is suitable for vegan and those who are allergy to it.
Frankly speaking, I've never made eggless cake before.
I was just afraid that my cake will be a complete disaster if I omit egg.
Egg provides stability to the cake's structure and by adding egg, it helps the cake to rise even more while enhancing it's flavor.
But this one is a total exception, because your cake is not going to be dense and hard as long as you add baking powder or baking soda and oil into it.
On top of that, the meshed bananas will help to soften and moisten the cake.
Just do not expect this cake will rise as much as when you add in egg into it.

I referred to the recipe from Katie to make this chocolate banana snack cake.
According to her, this cake is best to be prepared ahead of time as it tastes better on the next day.
I can't help but to have a try at that instant it was baked.
The cake was ambrosial, scented with mouth-watering aroma of cocoa powder and fruity flavor of ripened bananas.
It was perfect for almost any occasions.
And it do best for breakfast on the go too and as a quick tidbits.
My hubby is so fond of this cake and within a minute, he gobbled three slices without any interval between bites! 😅😅😅


The recipe called for granulated sugar, but I used honey as sugar substitute.
Honey is sweeter than granulated sugar, so make sure to reduce the amount when using.
To add it's nutritional value, I added two tablespoons of chia seeds.
These tiny seeds are enriched with healthy fat.
You can grind them to get the ground chia, but I prefer to add them in the raw form to add some crispiness in my cake.
Chia seeds are rich in fiber, so they would aid in your digestion.
If you are interested to learn more about how chia seeds can benefit your health, you can read my article on the benefits of chia seeds here.

The best part is, this cake, even having with just one slice, is sufficient to relief my hunger strike in between meals.
The secret is, you have to take time to chew your cake, enjoying every single bite whilst helping your digestive organs do their job at a more relax pace.
I was wonder if this cake would really taste better when I keep it to the next day like what Katie said in her post, so I had to hide a few slices and had them refrigerated.
This morning, before I had my main dish for my breakfast, I took out a slice to be eaten as appetizer.
And guess what, it did tasted even better!
It was richer in flavors.
You should try it yourselves.
Next time I'll double the ingredients and have them refrigerated for my sweet treats.


Chocolate Banana Snack Cake (Vegan)

Adapted From : Katie
Yield : 16 small slices

1 cup of white whole wheat flour
2 teaspoons of baking powder
1/4 teaspoon of baking soda
1/4 cup of unsweetened cocoa powder
1/4 teaspoon of salt
2 tablespoons of chia seeds
2/3 cup of water
2 tablespoons of natural honey
2 large overripe bananas - mashed
1/4 cup of coconut oil/melted butter/nut butter
1 teaspoon of vanilla essence
chocolate chips - optional

Methods:


Line a 8 x 8 square pan with baking/parchment paper.

Preheat oven to 180℃.

In a large bowl, add in all the dry ingredients (flour, baking powder, baking soda, cocoa powder, chia seeds) and whisk to combine.

Add in the remaining ingredients and mix well.

Pour the cake batter into the prepared pan and sprinkle chocolate chips on top.

Bake at center rack for about 30 to 40 minutes or until inserted wooden skewer comes out clean.

Let cool completely and cut into small slices.

Keep the leftover in an air-tight container and refrigerated.


#NOTE#

The recipe above is based on my own version of chocolate banana snack cake after doing few alterations according to my preference.  
For original recipe you may refer to Katie's blog in the link provided earlier.


Monday, 5 August 2019

3 Ingredients Chocolate Banana Ice Cream (Vegan, Gluten Free)


Chocolate banana ice cream is our favorite ice cream now, and I've been making it repeatedly for weeks.
It has smooth textured, exactly similar with the store bought ice cream.
But this one is a healthier ,gluten free and vegan version of ice cream that everyone can indulge without guilt!
The best part is - you don't need an ice cream maker to make it.
It is so refreshing, rich in chocolate banana flavors that make us crave to eat more and more.

This ice cream is perfect for any occasions - as dessert, pre or post- workout treats, breakfast or snack.
It is free of refined sugar, making this ice cream a delicious, guilt-free treat rather than having a glass of store bought fruit juice or a can of soda beverage.
You don't need to add sugar or any sweetener, as bananas are already packed with sugar in the form of sucrose, fructose and glucose.  
Every 100 grams of banana contains 12 grams of sugar and the sugar content vary according to their ripeness.  
Despite of its high sugar content that can elevate your blood sugar, banana has lower glycemic index (GI)  and adequate amount of fiber to control blood sugar spikes.
So, to avoid excessive sugar added to your ice cream, don't use over ripe bananas.

You might wonder why chocolate-banana combination are so popular especially among the health junkies.
A lot of food bloggers showcase their delicious muffins, cakes, ice creams, sorbets, smoothies, cookies and pies by using this combination.
All I can say is chocolate and banana, when combined, they exert an absolute satisfaction not only to your palate, but also to your overall health.
Dark chocolate or cocoa powder has polyphenols that can put you into a happier mood and antioxidant do a lot of contributions to your body more than you can imagine.
Banana is an instant energy booster and together with cocoa powder, they control blood sugar and slows digestion process, so they won't bring your blood sugar to the roof.
So, go ahead and try a lot more delicious treats with chocolate and banana to reap their benefits!

Last time my hubby and I used to buy a box or two of ice creams to be eaten plain or with our favorite waffles and brownies, but as we aware and become more conscious, that is, to think before you eat, we stop buying ice cream and I am glad that I found a better option to ease our ice cream craving.  
With this chocolate banana ice cream, it's not only improves my mood swing, it gives a sense of relief without getting anxious on how many pound I'll be gaining after indulging my favorite ice cream.

If you are just like me, looking to shift to a healthier option for ice cream, this chocolate banana ice cream is perfect for you!


3 Ingredients Chocolate Banana Ice Cream

Course : Desserts, Healthy Snacks
Serves : 3


3 large ripe bananas - chopped and frozen for at least 3 hours
3 tablespoons of dark cocoa powder
1 1/4 cups of almond milk/ drinking water
1 to 2 tablespoons of honey (if necessary)

Toppings (optional)

Chocolate chips
Sliced banana

Methods:

  1. In a bender or food processor, put in the frozen banana chunks and add in milk.  Pulse until smooth.
  2. When the mixture is smooth, add in cocoa powder and honey (if using) and blend until all the ingredients are well incorporated.
  3. Transfer the mixture into a container and put back in the freezer for at least an hour.
  4. When the ice cream is solid and scoopable, serve immediately.


#NOTE#

I recommend you to use ice-crusher blender or powerful blender as frozen bananas are very hard and forcing your normal blender to fiercely blend them will damage the blender motor.  Blender need to have enough horse power to crush the frozen bananas, with the motor has at least 400W of power.
To put on a constant blending process will also burn and damage the motor.  So, firstly, you need to just briefly pulse for few times until the frozen bananas crushed into smaller pieces, then gradually increase the duration for each pulse until they become smooth textured.


Saturday, 27 July 2019

Easy Whole Wheat Tortilla (Vegan & Egg Free)


Tortillas aren't a big part of my family culture.
Being living in an Asian country; Malaysia, our staple carbohydrate source is rice.
Then..migrating to live my adult life in the city of Malaysia has helped me to explore different food choices from all over the world.
Whats more, internet makes our life so convenient that helped to resolves our curiosity on various eating cultures by just a quick search on the search engines.

So this is how I am able to create my own whole wheat tortillas.
I found a few whole wheat tortilla recipes from websites with very simple preparation.
This is my third time I was making my own tortillas and the previous two I made two years ago by using plain flour.
I can't recall how my previous tortillas looked like.
I was so excited to share on the outcome of my homemade whole wheat tortillas that I can't wait to blog about it!
After making few mistakes, especially during the dough resting time, I finally managed to overcome excessive dough retraction when I cook my tortillas.
All I can say is it is easy to prepare yet challenging to produce the perfect outcome.
Here, I am going to share with you on how to reduce your tortillas from excessive retraction when you rolling or cooking them.

I am sure you are familiar with the magical word of GLUTEN.
What does gluten do and how it can affect the shape of your dough?

Gluten is a kind of protein that form elastic network when flour is moistened and manipulated.
It helps to shape and hold the structure of baked goods.
Without gluten, your cookies may crumble at the touch.
RESTING is another important factor in getting the perfect structure of any kind of baked goods and and tortillas aren't an exception.
Resting allows the gluten to relax and easily reform the protein strand for the final dough shape.

During my tortillas making experiment yesterday, I had my dough well rested for 1 hour.
But I was still struggling to shape my dough into a thin, round layer tortillas-like shape.
I wonder what was wrong with my tortillas dough (I felt really frustrated at that time!).
After struggling to shape two portions of the dough, even though the rolled dough is not as thin as I wanted, I still proceed to cook them.
And guess what, both of them were severely retracted during the cooking process and became much smaller in size!
Then, I tried to flatten the rest of the portions into a small disc-shaped like with my palm and have them rested for another 10 minutes.
And finally, I was able to easily shape my dough thinly and my tortillas weren't retracted when I cooked them.  Yeah!

Next time, when I make tortillas, I'll make sure to flatten the dough first before put it to rest.
When you flatten the dough, the protein stands are adjusted into that shape so when you roll your dough, it won't retract.

I added 1 cup of all purpose flour as I don't want my tortillas to be too dense in texture.

Easy Whole Wheat Tortilla

Course : Breakfast, Snack, Lunch, Dinner
Yield : 12


2 cups of wholewheat flour
1 cup of all purpose flour
1 teaspoon of salt
1/2 cup of vegetable oil
Approximately 1 cup of warm water

Methods:


In a large mixing bowl with attached flat beater, add whole wheat flour, all purpose flour, salt.  Mix until all ingredients are well incorporated.

Slowly add in vegetable oil and warm water while mixing. Knead the dough until a soft, non-sticky ball is formed.  Add in more flour or water when necessary.

Alternatively, if you are using bread machine maker, pour in all the ingredients and select the menu to "dough" and press the "start' button.


Floured your working surface with flour.  Take the dough out of the mixer and transfer it onto the floured surface.


SHAPING THE DOUGH


NOTE: This picture was taken before I flatten the dough. For easy shaping the dough later, flatten the dough balls first.

Divide the dough first into two, then cut each portions with another six small portions like cutting a pizza.  Roll them into round shape balls and flatten the balls with your palm. Store the flatten dough in a container or ziplog bag and let rest for at least 20 minutes.  (To prevent them from sticking, coat each of the flatten dough with flour).


Dust the surface with generous amount of flour and place one dough at the center.  Dust a wooden rolling pin and the top surface of the dough with flour and roll into a thin, round shape.


COOKING THE TORTILLAS


Heat a flat pan or cast iron griddle to medium low heat.  Grease with little oil if necessary.

When the pan is hot, add tortilla. Flip to the other side when bubbles start to formed.  For eating tortillas on the spot, cook until brown spots have formed on the surface.  To make tortillas for storage, cook for about 20 seconds for each sides, just until light brown spots have formed.

Cover the tortillas with a towel to prevent exposure to the air and the cooked tortillas from getting stiff.

Serve warm with favorite toppings and gravy.


STORING THE TORTILLAS


Keep the leftover in a ziploc or air-tight plastic bag and store in refrigerator until ready to use.