Indian Cuisine

Showing posts with label Indian Cuisine. Show all posts

Saturday, 12 December 2020

Rojak Mee aka Rojak Mamak


If I have to choose between Rojak Petis and Rojak Mee, I will definitely choose Rojak Mee.

Rojak Mee is consider as one of the Malaysian salad which consists of shredded turnip, cucumber, cucur udang (prawn fritters), fried tofu, fried bean curd (tempeh), fried potatoes, hard boiled eggs and blanched yellow noodles (mee kuning), eaten with sweet and spicy nut sauce or called as kuah kacang in Malay.

The deliciousness of rojak mee actually lies in the taste of the nut sauce, which is made of dried red chilies, peanut, onion, garlic, shallot, dried shrimp or dried squid, sugar and salt.

You can use orange sweet potatoes, boiled and blend until smooth or finely ground Marie biscuits to thickens the nut sauce.


Some of the nut sauce recipes called for the usage of palm sugar or Gula Melaka to make the nut sauce.

I love the flavors of palm sugar in my nut sauce, but I prefer to add two types of sugars - palm sugar and dark brown sugar (gula merah) when I make the nut sauce.

Dark brown sugar contains more molasses which will makes your nut gravy dark in color with richer caramel flavor.

I like my nut sauce to be darker in color in order to distinguish between nut sauce that is eaten with compressed rice and the nut sauce for Rojak Mee.


Watch my video for step-by-step tutorial on how to make Rojak Mee here:


To make Rojak Mee at home, to be honest, there is a lot of preparation that you need to do.

For me, I prefer to make the prawn fritters first, followed by preparing the fried tempeh and fried tofu. 

Meanwhile, you can start boiling the eggs and blanch the yellow noodles.

You'll have to boil the potatoes until you can easily poke the potatoes with a bamboo skewer or a fork, then cut them in half before deep frying until golden brown.

I will make the nut sauce after I finished preparing Rojak Mee's "accessories" because I want the nut sauce to be hot when I serve.

The nut sauce will be more delicious after it is reheated because all the flavors from the ingredients to make the nut sauce will mingle together, forming new molecules to make the nut sauce more flavorful.

Each time when I make nut sauce, I'll make sure to prepare extra portions to be eaten with stuffed tofu (tahu sumbat) or onion fritters (cucur bawang).

You can freeze the nut sauce, and it can stays up to a few months if frozen.

I love to use onion and Holland onion to make my nut sauce.

Holland onion is sweeter with more delicate in flavor compared to the onion, which has a sharp and more pungent flavor.

Some of the nut sauce recipes called for adding shallots, you may add 1 or 2 shallots for this recipe if you like, but I prefer to use onion only.


Let's get the recipe of Rojak Mee.  


ROJAK MEE / ROJAK MAMAK


Category : Resepi Mee, Indian Cuisine

Serving Size: 10 - 12 people

Preparation Time : 35 minutes

Cooking Time : 40 minutes


INGREDIENTS


Prawn Fritters (Cucur Udang) :


2 cups of all purpose flour

1 teaspoon of instant dry yeast

1 medium sized egg

1 tablespoon of dried shrimp (soaked for 5 minutes and finely chopped)

1/2 teaspoon of salt

1/4 teaspoon of turmeric powder

Approximately 1 & 1/2 cups of water

1/2 onion - diced

3 plants of chive - cut into 2 cm pieces

A handful of bean sprouts  

13 to 15 medium sized prawns

Oil for frying


Nut Sauce:


1 cup of peanut

6 pieces of Maries biscuits

1 small block of palm sugar  (gula Melaka)

6 tablespoons of dark brown sugar (gula merah)

1 liter of water

500 ml of water (to blend ingredients)

1 inch of ginger* - coarsely sliced

1 onion*- coarsely sliced

1 Holland onion*- coarsely sliced

4 cloves of garlic*- coarsely sliced

20 pieces of dried red chilies* - cut in half and remove some of the seeds

2 tablespoons of dried shrimps* - soaked for 10 minutes

Cooking oil as needed for frying spices ingredients


Other Ingredients:


2 blocks of soybean cake (tempeh) 

4 blocks of hard tofu

5 eggs 

2 to 3 potatoes

Julienned/Shredded cucumber

Julienned/shredded turnip

Chopped salad

500 grams of yellow noodles


INSTRUCTIONS


Prawn fritters (cucur udang):


In a mixing bowl, combine flour, salt, chopped dried shrimps, turmeric powder and dry yeasts.  Stir the mixture with a whisk or a wooden spatula until combined.


Add 1/3 of water to the dry mixture, and whisk until mixture forms a thick paste.  Then add in another 1/3 of water and continue whisking until a thick batter is formed.  lastly, add in the remaining water and whisk until the batter is smooth.


Crack in an egg into the batter and whisk until fully combined.


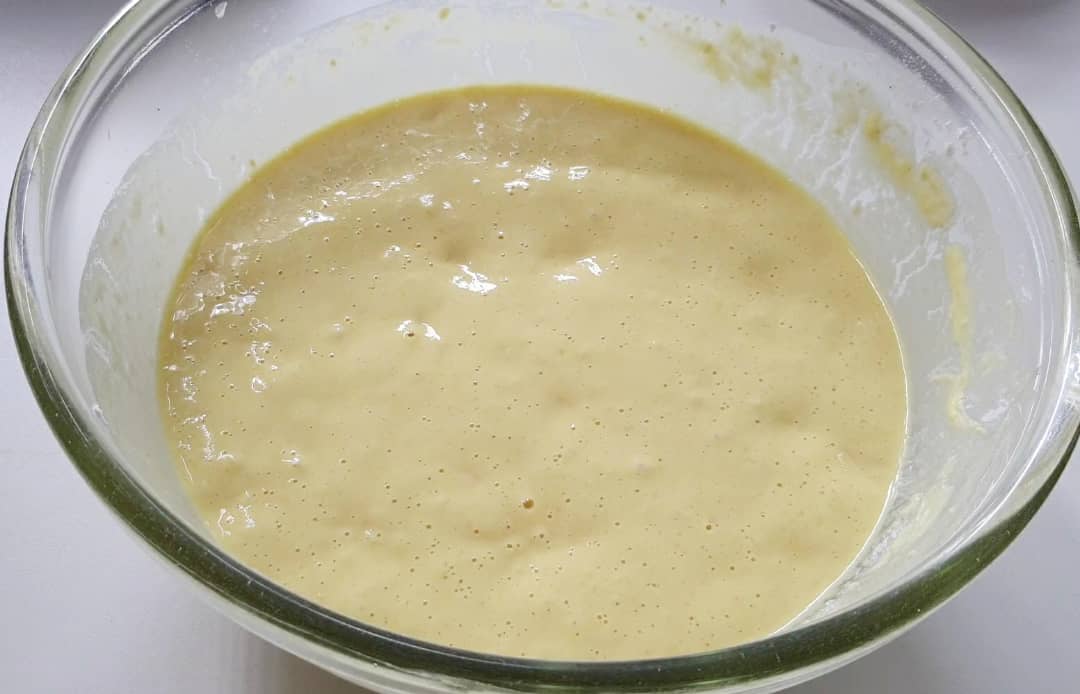
Cover the bowl with with a clean towel or cling wrap and let it sit at warm place for 30 minutes, until you can see bubbles are forming.


After 30 minutes, preheat oil for deep frying in a frying pan or a pot over medium heat.  


Add in diced onion, bean sprouts and chive pieces into the batter and mix gently with a spatula, or a spoon until just combined.  Do not overmix to prevent the batter from deflating.


When the oil is hot, dip a stainless steel/ metal ladle in the hot oil for a few seconds to preheat the ladle before using.  Spoon some of the batter onto the hot ladle and top with one prawn.  Submerge the ladle  into the hot oil for a few seconds for deep frying.  Once you see the surface of the prawn fritter is firm, gently shake the ladle to detach the fritter from the ladle.  You may have to push the fritter with a tong or a heat proof spatula to help loosen the fritter from the ladle.  Deep fry for 1 to 2 minutes, until golden brown on all sides.


While waiting for the first fritter to set, you can start making for the next fritters.  Do not overcrowd the pan/pot as to ensure fritters are even fried on all sides.


Place fried prawn fritters in a colander or paper towels to drain excess oil. 


Once the fritters are cool, cut each fritter into 4 with a knife.  Place the fritters in a container.


Other Ingredients:


Fried soy bean cakes, fried tofu & fried potatoes


Deep fry tofu block and soybean cake until golden brown on all sides, then, place the fried tofu and soybean cake in a colander or on a paper towels to drain excess oil.  Once the fried tofu and soybean cake are cool, cut into 6 to 12 pieces each.  Place fried tofu and soybean cake pieces in a container.


Bring water to boil over medium heat.  Use a ladle to put in the eggs into the boiling water to prevent cracking.  In the same pot, add in cleanly wash (with skin on) potatoes.  Boil eggs and potatoes until potatoes are tender over medium heat.  


Place boiled eggs into cold water to easily peel the eggs.  Peel off the skin and cut the eggs in half. 


Allow the boiled potatoes to turn warm before peeling off the skin and cutting them in half.  Deep fry the potatoes until golden brown.  Cut the fried potatoes into 6 pieces each and place in a container.


Bring a pot of water to boil.  Add in a pinch of salt and yellow noodles.  Cook briefly until tender and then drain the water.


Nut Sauce:


Roast peanuts in a pan over medium heat, until the dark brown spots start to appear on the peanut skin.  Finely grind the roasted peanut with a dry blender.


Heat about 1/4 cup of oil in a pan.  Once oil is hot, fry garlic, Holland onion, onion, ginger and soaked dry shrimps until onions are translucent.  Transfer the ingredients into a blender.


Using the same oil (you may need to add about 3 tablespoons of cooking oil), fry dry red chilies over medium-low heat until the chilies are crispy and turn darker.  Be careful not to burn the chilies.  Transfer fried dry red chilies in the blender.


Pour 500 ml of water into the blender and blend the fried spices until smooth.


Finely grind the Marie biscuits in a dry blender.


Bring 1 liter of water to boil in a pot.  Add in blended spices, ground peanut, palm sugar, dark brown sugar and ground Marie biscuits.  Simmer over medium heat until the sauce is slightly thickened or reaching your desired consistency.  Stir occasionally to prevent crust from forming at the bottom of the pot.


Season the nut sauce with salt.  Give it a quick stir and then turn off the heat.


How To Serve Rojak Mee:


Take a small amount of yellow noodles and place on a serving plate.  Add a handful of prawn fritters pieces (make sure your glove is on) followed by a few pieces of fried tofu and soybean cake.  Top with a small handful of julienned/shredded turnip and cucumber.  Add halved hard-boiled egg.  

Lastly, pour 1 or 2 ladles of nut sauce.  Enjoy!


Thursday, 22 October 2020

Mee Goreng Mamak


This dish makes me reminisce of my cherished memories when I was still studying in university, completing my three years undergraduate course about 10 years ago.

Back in the day, my housemates and I used to eat mee goreng mamak at Mamak stall nearby our rent house.

I was so in love with mee goreng mamak, for it's authenticity which makes it distinct from Malay style fried noodles.

Mee goreng mamak has slightly different in flavors - despite of the similarities of it's basic ingredients with the Malay style fried noodles.

Mee goreng mamak also use shallots, garlic, dried chili paste, dark soy sauce and not forgetting, the chili, tomato ketchup and oyster sauce to spice up the dish.

But what makes it different and special is - the additional of the seasonings, which are fried potato and prawn fritters (cucur udang), cut into bite sized pieces and added last after adding the noodles.


Actually, it has been a few days from my last shooting for my baking channel.

When there's too much baking ideas flooding my mind, I become indecisive.

That's why I have to temporarily distract myself from focusing on my baking projects and instead, I want to finish my writing.

Currently, I am not in the mood to bake for my shooting, because now I just prefer to sit and ponder with my thought, playing around with my wild imaginations and immerse my self in reading self help blogs. 

Only by reading, I can finally get back my alone time, to recharge and being aloof as I'm always be and away from investing my energy into pleasing other people, being an extrovert when I'm actually an introvert and thus, putting extra energy into making everyone happy.

This is also the time when I invest my energy into gaining new perspectives and indulge in positive thoughts as a way of distractions from the harsh reality of life and retreat myself into my vivid, rich inner-life which I seldom share with anybody.    

While I'm taking a "short break" from my baking project, I want to enjoy cooking delicious dishes for my little family, and one of it is to cook this scrumptious mee goreng mamak.


Nowadays, I seldom find the store bought mee goreng mamak with bite-sized pieces of cucur udang.

It seems that prawn fritters are no longer a favorite and a must have ingredient for making mee goreng mamak.

Since mee goreng mamak is one of Indian's signature dish, I added a small amount of curry powder into it, so this version of mee goreng mamak has a light curry aroma in it.


Mee goreng mamak is unlike mee goreng basah, so you don't have to add a lot of water when cooking mee goreng mamak.

The key is to always use fresh ingredients and serve immediately after cooked.

I made my prawn fritters to make my mee goreng mamak with using only dried shrimps, which I pound coarsely after I soaked them for a few minutes, just to soften slightly to make the grinding process easier.

Other than fried potato and prawn fritters, you'll also need to add a block or two of hard tofu, cubed and deep fried to be added into your mee goreng mamak.


This mee goreng mamak is absolutely delicious, and my whole family liked it!

I would recommend you to give this recipe a try if you want to taste homemade version of mee goreng mamak.

Furthermore, this is the perfect time to improve our cooking skills at home, since we have yet to free from Covid-19 and now we're still under movement control order to curb the spread of this virus.

You can season your mee goreng mamak with meat and seafood of choice, such as chicken, beef, shrimp or cuttlefish if you have any.

Adding meat and seafood not only giving additional flavors to your mee goreng mamak, these ingredients will also add more textures into the dish!

So, always be limitless when it comes to cooking.


Happy cooking and good luck!


MEE GORENG MAMAK


Category: Ala Carte, Indian Cuisine

Preparation Time : 20 minutes

Cooking Time : 20 minutes

Serving : 5 to 6 people


INGREDIENTS:


PRAWN FRITTERS (CUCUR UDANG)


1 cup of all purpose flour

1/2 tablespoon of dried shrimps (soaked 1 minute)

Salt to taste

3/4 cup of lukewarm water

1/4 teaspoon of instant dry yeast

1 tablespoon of chopped onion

1 stalk of chives (cut into 1 inch pieces)


MEE GORENG (FRIED NOODLES)


500 grams of mee kuning (yellow noodles)

1 medium potato - cubed

2 pieces of hard tofu 

Fritters

2 tablespoons of chili sauce

2 tablespoons of tomato ketchup

1 tablespoon of oyster sauce

3 tablespoons of dark soy sauce

1/2 cup of water

3 stalks of chives - cut into 2 inch pieces

1 tomato - chunked

1/4 carrot - julienned

10 pieces of fish balls - halved

2 cabbage leaves - cut into bite size pieces

2 eggs

2 to 3 shallots*

2 cloves of garlic*

1 clove of garlic - crushed

4 tablespoons of dried red chili paste

1/2 tablespoon of meat curry powder

1 teaspoon of chicken stock powder (optional)

3 tablespoons of cooking oil

Salt if needed


GARNISH:


Limes

Cucumber - sliced

Chinese celery - chopped

Green onions - chopped

Red chilies - sliced

Salad - chopped

Fried shallots


INSTRUCTIONS


PRAWN FRITTERS (CUCUR UDANG)


In a medium bowl, add in flour, salt and dry yeast.  Stir together with a spoon or spatula.

Coarsely pound or grind soaked dried shrimp and add into the flour mixture.

Slowly add water while mixing to make fritter batter which is not too thick or too thin.  Adjust water amount accordingly until you get the right consistency.

Lastly, add in chopped onion and chives cut into 2 inch pieces and mix well.  

Cover the bowl and allow the batter for 15 minutes rest in a warm area to activate the yeasts before deep frying.

Heat oil in a pan.  Once oil is hot enough, spoon the batter into it and fry until the fritter is light brown on all sides.  Do not overcrowd the pan for easier flipping process and to ensure the fritters are cooked through.

Place the fritters on a colander and let it cool before cutting into bite size pieces.


MEE GORENG MAMAK


Using the same oil, fry hard tofu until brown on every sides.  Cut the fried tofu into cubes once it is cool.

Fry cubed potato until light brown.  Set aside.

Blend or pound ingredients marked with * (shallots and garlic) to make onion paste. Set aside.

Heat about 3 to 4 tablespoons of oil in a wok or pan.  Once hot, add in crushed garlic and stir fry over medium high heat until fragrant and slightly charred. 

Then, add dried chili paste and fry for a few seconds, then add in pounded/blended spices and stir fry until fragrant and the color turns darker.  At this point, you'll also begin to see oil is separating (pecah minyak).

Add half tablespoon of meat curry powder and stir.

Add in water, dark soy sauce, chili sauce, oyster sauce, chicken stock powder and tomato ketchup.  Stir and simmer until the gravy starts bubbling.

Scrape the gravy to one side of the pan with a spatula, then crack in 2 eggs.  Stir the eggs quickly until they're partially harden and lumpy.  Incorporate the eggs with the gravy.  

Add in fried tofu, fish balls and carrot.  Cook for a few minutes until carrot pieces are tender crisp.

Add in yellow noodles, together with chopped cabbage, fried potato and fritters. Stir until all ingredients are well incorporated and cook for 1 to 2 minutes.

Lastly, add in chives pieces and tomato, stir for a few seconds, just until combined.

Turn off the heat and season with salt.

Serve immediately with sliced cucumber, limes, salad, chopped Chinese celery, chopped green onion, sliced red chilies and fried shallots.  Enjoy!


Monday, 13 April 2020

Easy Tandoori Chicken Recipe


Who else is a fan of Indian cuisine here?
Indian cuisine has become so popular not only in my place but all across the globe.
It's commonly available in Kedai Mamak or Mamak stalls, with roti canai (Indian flat bread), dhal, biryani, curry, naan and tandoori being their signature dishes.

What makes Indian cuisine special is their usage of spices and masala as the meat marinade and their other dishes.
Today, I'm going to share on of their signature chicken recipe, which is Tandoori chicken.
Before I started, do you wonder how does Tandoori chicken gets it's name?
At first, I thought that Tandoori is actually a name of a special spice use to marinade the chicken.
I had no idea that the word tandoori is in fact is derived from the word "tandoor", a cylindrical clay oven widely used for cooking and baking in India, Pakistan, Afganistan and other part of Asia.
So Tandoori chicken gets its name since the dish is originally cooked in tandoor.

Nowadays, since it is uncommon to have a tandoor at home, Tandoori chicken is cooked by using a barbecue grill or grilled on a stove top.
I don't have barbecue grill at home since we rarely have barbecue party at home..
I cooked my Tandoori chicken on a non-stick pan since I was too lazy to clean my stove top if I use my mini barbecue grill basket to grill my chicken.
So, please choose the most convenient method for you to cook your Tandoori chicken, alright!

If you plan to enjoy your Tandoori chicken today, I would recommend to have the chickens marinated on the day before and keep it refrigerated in a ziploc bag until you're ready to cook the chickens.
Some of the recipe don't recommend to marinade the chickens for over 8 hours (I'm not sure why is it so), but for me, it is okay if you left your Tandoori chicken marinated overnight.
Just make sure it is chilled, to prevent the chickens meat from getting spoiled.

What makes Tandoori chicken special is that, the combinations of garam masala, paprika, chili powder, lime juice,fresh ginger and garlic gives the chicken zesty, earthy and warm flavors.
The marinate helps to tenderize the chickens, so they'll remain juicy after cooked.
Plus, the additional of yogurt, or you may substitute it with buttermilk adding a sweet and savory flavors to your Tandoori chicken.
It is still taste so good even without grilling it in a tandoor or barbecue grill, to add a smoky flavor to your Tandoori chicken.
Just ensure that you have your chicken well-marinated before you cook them.

Actually, this was my second time of making my homemade Tandoori chicken, and I like this version much more than my previous one.
In this version, I added ground coriander in the chicken marinade and had the spices stir fried first before incorporating the spices with the buttermilk. (I ran out of Yogurt stock at home, so I substituted with buttermilk instead).
Stir frying the spices will make the Tandoori chicken more fragrant and enhance its flavors.
I prefer to use dark meat chicken with the skin on for my Tandoori chicken since these parts are more juicy and richer in flavors.

We both love to enjoy our Tandoori chicken with naan bread, but it is also perfect to be eaten with white rice or biryani.


TANDOORI CHICKEN RECIPE


Cuisine : Indian
Serve : 2-4


Ingredients:


4 chicken drumsticks - skin on
1/4 cup of fresh milk
1 teaspoon of lime juice/lemon juice/vinegar (for buttermilk)
Additional 1 teaspoon of lime juice - optional of you prefer it slightly sourish
3 cloves of garlic - finely ground
1.5 cm of ginger - finely ground
1 teaspoon of coriander seeds - soaked and finely ground
2 tablespoons of vegetable oil
1/2 tablespoon of paprika
1/2 tablespoon of garam masala
1/2 to 1 tablespoon of chili powder
1/2 teaspoon of turmeric powder
Salt to taste


Instructions:


  1. To prepare buttermilk (if you don't have yogurt), in a bowl, add  a teaspoon of vinegar/ lime juice/lemon juice and pour in the fresh milk.  Let the mixture sit for a while and curdle.
  2. Heat vegetable oil in a pan. Then, cook the finely ground coriander, ginger and garlic until fragrant over medium heat.  Then add in paprika, garam masala, chili powder and turmeric powder, stirring often until fragrant, about 1 minute.  Turn off the heat and let it cools.
  3. Once the spices is cooled, combine it with the buttermilk, add lime juice and season with salt.
  4. Cut deep slashes on the chicken drumstick to allow the marinade to diffuse in the chicken meat and coat the chicken in the marinade, cover or keep in a ziploc bag and chill until ready to be cooked.


TO GRILL OR COOK THE TANDOORI CHICKEN:


If you want to grill the chicken:

Prepare the grill so that one side is over direct heat and the other side is cooler.  If you're using charcoal, leave one side of the grill without coals.  Grease the grill grates with vegetable oil or you may use tong to hold the the paper towel soaked in vegetable oil, to prevent the chicken pieces from sticking to the grill grates.

Shake off excess marinade, and place the chicken pieces on the hot side of the grill, turn the chicken pieces so it is brown and a bit charred on all sides.

Transfer the browned chicken pieces on the cool side of the grill, cover and cook for 15 minutes (or more) .  To know if the chicken is done, poke a hole at the center of the chicken using a wooden skewer or a fork, and it is cooked when its juices run clear.


If you are using a non-stick pan:

Grease the non-stick pan with vegetable oil.  Once the pan is hot, place the chicken pieces and cook over high heat in the first 10 minutes, or until until it is brown on all sides.  Then, reduce to medium heat, cover and cook until chicken pieces is done.  You may need to slosh oil over the chicken pieces while cooking to prevent it from getting burned.


HOW TO SERVE TANDOORI CHICKEN:


Place cooked or grilled Tandoori chicken on a serving plate.  Sprinkle sliced onion over and decorate with sliced lime.  Serve immediately cooked or grilled Tandoori chicken with naan or rice of your choice.

Enjoy!


Dalca Sayur / Easy Vegetables Dhal Curry With Coconut Milk Recipe


Dalca or dhal curry is a common dish not only in Indian culture, but also among Malay.
This dish is especially prepared during wedding occasions, and dalca is serve with nasi minyak (rice cooked with ghee, vegetable oil, onion and other spices), nasi tomato (tomato rice) or biryani rice along with ayam masak merah (sweet and spicy chicken dish), kurma daging (beef korma) and acar (vegetable pickle).

Most of us are familiar with dalca, and in our culture, dalca is a dish which is named after the yellow lentils or dhal as its main ingredient.
Dalca is usually cooked with meat to enrich the flavor and added with vegetables such as carrots, potatoes, round brinjals and tomatoes that adding variety of texture to the dish.

Cooking dalca with meat added is not going to be an option for vegan.
And as such, another version of dalca, which is prepared without meat is designed, called dalca sayur or vegetables dhal curry, thus everybody can enjoy the deliciousness of dalca.
For me, I love both versions - with and without meat.
Sometimes, I'll add chickpeas in my dalca.
Most Indian dalca is prepared without adding coconut milk to the dalca gravy, but in my culture, coconut milk is a must add ingredient.

The yellow lentils (or kacang dhal) need to be soaked for few hours, to reduce the cooking time and is added into the dalca gravy and continue to be cook until soften over low heat.
If you prefer your dalca gravy to be thicker and creamy, you have to boil the soaked yellow lentils until it is really soft and mash with a fork or blend until smooth.
Then only it is added in the gravy.
I've never done this way when I cook dalca before, and I'm excited to give it a try next time when I prepare dalca for my roti canai.


You must remember, dalca tastes a lot better when is cooked with meat, since meat is rich in meaty and sweet flavors, especially the red meat.
And now, you're going to cook vegetables dalca, or dhal curry without the additional seasoning from meat.
It is going to taste a little bit bland, particularly when you've never tried vegetarian dish before.
So what you're going to do is to enhance the flavors to ensure you dalca tastes interesting, savory and flavorful by altering and adding alternative ingredients and spices.
If you're not a vegan and you just want to try making vegetables dalca, I would recommend to add chicken or anchovies stock powder into the dalca gravy like I did.
And guess what, we did not even remember that we were eating vegetables dalca, simply because it was so good!

Another option especially if you're vegan, instead of using the basic spices for making dalca, like onion, shallots, garlic, ginger, and empat sekawan (clove, cinnamon, star anise and cardamom), you can try adding cumin, fennel seeds and coriander along with those spices to make your dalca more flavorful.
Oh! How I love those spices, especially coriander in my dishes and marinade!
Just remember to not put cumin too much or unless it will ruin the taste of your dalca.
I recommend to use the ratio of 0.5:1:2 for cumin, fennel seeds and coriander into your vegetables dalca.

Let's get the details of my vegetables dalca recipe below 👇👇


DALCA SAYUR
VEGETABLES DHAL CURRY WITH COCONUT MILK


Cuisine : Indian, Malay
Serve : 6


Ingredients:


1/4 cup of dhal (yellow lentils) - soaked 1 hour
1 round brinjal - cut into bite size
2 potatoes - cubed
1/2 carrot - cut into 3 cm long, thick stick
1/2 long melon (labu air) - cut into chunks
A handful of green bean (kacang buncis)/ a small handful of long beans - cut into 4 cm long
1 tamarind slice / 1/4 cup of tamarind juice (mix 1/2 teaspoon of tamarind paste with 1/4 cup of water)
1 1/5 liters of water
1/2 anchovies / chicken /beef stock cube or 1/2 tablespoon of anchovies/chicken/beef stock powder
1/3 cup of coconut cream (I used KARA brand)
5 dried red chilies - cut into 2
1/3 cup of cooking oil
Salt to taste
Sugar to taste
1 stalk of curry leaves - optional
1 clove of garlic - sliced
1/2 onion - sliced

Ingredients To Be Blend:

1/2 onion
5 shallots
4 cloves of garlic
1 inch of ginger

Other Spices:

2 star anises (bunga lawang)
1/4 stick of cinnamon (kulit kayu manis)
5 cloves (cengkih)
4 cardamoms (buah pelaga)
4 tablespoons of curry powder
1 teaspoon of turmeric powder


Instructions:


  1. Blend all the ingredients to be blended.  Combine curry powder and turmeric powder in a small bowl and add a few tablespoons of water until it forms paste.  Set aside.
  2. Heat oil in a wok or a pot over medium heat.  Add sliced garlic, sliced onion, curry leaves, dried red chilies and empat sekawan (cinnamon, cloves, cardamoms and star anises) and cook until fragrant and onion is translucent.
  3. Add in the blended mixture and curry paste and cook until the oil is separating (pecah minyak).
  4. Add water and the soaked yellow lentils (dhal) and anchovies/chicken/beef stock cube/powder and simmer over low heat until the lentils are soft.
  5. Add potatoes and continue to cook until potatoes are tender.
  6. Add more water if the gravy is too thick.
  7. Add the remaining vegetables (carrot, round brinjal, long melon and green/long beans) and cook for another few minutes until vegetables are tender crisp.
  8. Pour in coconut cream, add tamarind slice or tamarind juice and season with salt and sugar.
  9. Simmer for another 1 to 2 minutes and your vegetables dalca is ready to be served!


#TIPS#

If you're using cumin, fennel seeds and coriander seeds in your vegetables dalca, all you need to do is to soak all those spices for 5 minutes and grind the spices.  Cook the ground spices along with sliced onion, sliced garlic, dried red chilies, empat sekawan and curry leaves until fragrant then only add in the blended mixture and the curry paste.


Wednesday, 25 December 2019

Easy Chickpeas Dhal Curry


Dhal curry is a staple dish for Indian.
The preparation to make dhal curry is almost similar with making curry.
The only difference is dhal or soaked red lentils are added into dhal curry.
I love both, but if I'm to choose between curry and dhal curry, I would prefer the latter.
Simply because dhal curry usually contains a lot of vegetables.
In Malay, dhal curry is commonly called as "dalca."
"Dalca" is a special dish eaten with biryani rice or 'nasi minyak'  during Malay wedding ceremonies.

The making of Malay dalca and Indian dhal curry is not much different.
We are still using curry powder, onion, ginger, garlic, spices like cardamom, cinnamon, star anise and clove.
Instead of coconut cream or milk, in making Indian dhal curry, they use curd and desiccated coconut to thicken and add milky and creamy flavors.

I'm excited to share my chickpeas dhal curry recipe that I've prepared today to be enjoyed with my homemade wholewheat garlic naan because chickpeas curry or dhal curry is not a common dish in my culture.
My hubby loves to eat chickpeas, that's why I try various dishes with chickpeas as the main ingredients.
What's more, these awesome chickpeas dhal curry is perfect for vegetarians, just skip the meat and anchovies powder in it.

Chickpeas dhal curry, like any other curries, is a versatile dish which is suitable to be eaten with rice, naan, tortilla, roti jala (Malaysian net crepe) and also perfect as a dipping gravy for taco and bread.
I can't remember how many times I've made these dhal curry before.
For more flavors, you can add chicken and meat in your chickpeas dhal curry.
Since chickpeas are the star in this dish, I just added chicken chunks, instead of chicken pieces in my dhal curry, just for seasoning.


The first thing to do when you' ve decided to make this chickpeas dhal curry is to soak your chickpeas and dhal (red lentils) for at least two hours, until they puffy and absorb most of the water.
Drain the excess water and wash thoroughly before added into your dhal curry.

I'm sharing the Malay's style of cooking dhal curry because I love the flavor and the creaminess of coconut cream in my dhal curry.
You may need to adjust the water portion to ensure that your dhal curry is not too runny or thick in consistency.
You can substitute tamarind juice with dried asam gelugur or tamarind slice.
I used dried chilies in my recipe, but you are free to use chili powder or chili paste to add spiciness in your chickpeas dhal curry.


KARI KACANG KUDA / CHICKPEAS DHAL CURRY)


Cuisine : Indian/ Malay
Serve : 5 to 6


Ingredients:

1 large onion - sliced
3 stalks of curry leaves
5 dried chilies (more if you prefer spicy)
5 cloves
2 star anise
1 small cinnamon
5 cardamom
4 cloves of garlic
1 inch of ginger 
5 shallots
5 tablespoons of curry powder - mix with 1/2 cup of water to make curry paste
1 liter of water
1 tablespoon of anchovies powder
1 cup of chickpeas  - soak 2 hours
1/2 cup of dhal - soak 2 hours
1 chicken breast - cubed
2 potatoes - cubed
1/2 carrot - cut into wedges
5 long beans - cut into 4 cm  long
1 medium brinjal - cut into chunks
1/4 cup of tamarind juice
150 ml of coconut cream
1/3 cup of cooking oil
salt to taste
sugar to taste


Instructions:

  1. Blend shallots, ginger and garlic.
  2. Heat oil in a medium pot and once hot, add in sliced onion, cardamom, cinnamon, clove, star anise, dried chilies and curry leaves.  Cook until fragrant.
  3. Add in blended onion and curry paste and cook until the oil separates from the mixture.  Stir frequently to avoid build-up at the bottom of the pot.
  4. Add in water, anchovies powder, soaked chickpeas and dhal and salt.  Cover the pot and simmer under low heat until the beans are tender and soft.
  5. Once soft, add in cubed chicken, potatoes and carrot.  Let it cook for about 5 minutes.
  6. Add in the remaining vegetables, followed by coconut cream/milk and tamarind juice.
  7. Lastly, add more salt and sugar to taste.
  8. Serve hot.


Thursday, 29 August 2019

Fluffy Indian Style Garlic Cheese Naan (Without Yogurt)


Today I'm going to share with you once again another dish that is so dear to my family.
I'm so passionate to try to make staple dishes from various cuisines, because sticking to a routine, mundane cooking habits and prepare the same dishes everytime will definitely kill my cooking interest.
To always stay motivated, I need to explore recipes and cook new dishes which allows me to improve my cooking skill and the most important is, to serve delectable delicacies to my dearest one.

So, here it is...

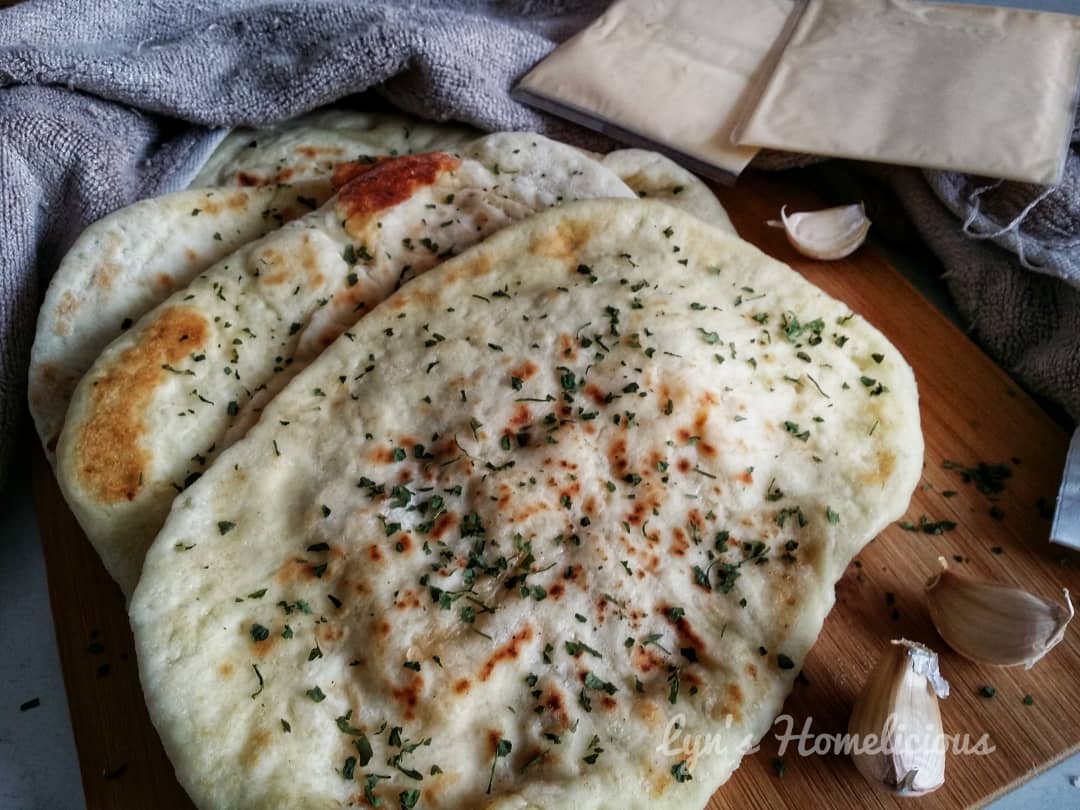
INDIAN STYLE GARLIC CHEESE NAAN.

Naan is a flat, yeast-leavened bread popular especially in Indian culture.
It's fluffy, soft in texture is definitely a heart-throb for Indian Cuisine lovers.
It's a must have dish to be serve in all Indian and Mamak restaurants.
Naan can be oval or round in shape, and is usually serve with curry, dhal and chicken tandoori.
Everytime I make my homemade naan, I'll prepare curry and tandoori as it's side dish.

The original naan version is plain flat bread, traditionally cooked in a tandoor, a clay oven shaped like a chimney pot.
The naan dough is stuck to the wall of the tandoor and cook until brown spots appear on the naan surface.
Because of the unique cooking method of naan, it is more common to be known as "Roti Tempayan" in Malay culture.
The tandoor used to cook naan is similar to the shape of tempayan (although  both have very different functions).
Instead of designed to cook naan in Indian Culture, tempayan is a large container made of pottery, usually used to store water.

Popular naan recipes - like garlic naan or cheese naan are the modified versions of the original, plain naan created to add more variety to the naan lovers.
My favorite naan is always the one with cheese.
But the recipe that I''ll share this time is as it's title, naan with added cheese along with garlic.
Garlic, especially if using the fresh garlic make the cheese naan flavorful and aromatic.
My hubby likes this naan version very much.
It's awfully delicious when enjoy with chicken tandoori and chickpeas curry that I'll provide the recipes in my next entry.

If this is going to be your very first time to make your homemade naan, don't hesitate because the good news is, it's easy to be prepared especially when you got the help from bread maker or stand mixer to do the kneading part, which I can say it's easy yet can be challenging to handle the quite sticky dough particularly when your do it by hand.
If you're going to knead the dough manually, you may need to prepare extra flour for dusting dough surface,  coat your hands and dust your working board.
Alternatively, introducing too much flour can cause your naan to gets hardened, so what you can do is, instead of using flour to prevent sticking to your hands, you can oil your hands and to your dough surface.

Due to it's fluffiness and fullness of cheese and garlic flavors, my hubby started to ask me to prepare this again!
As a matter of fact, as I'm updating this entry, it's actually my second time, after I made the initial naan the day before.
We finished off the first batch before I managed to take a single picture of my homemade naan!
So this picture that I took is my second batch of the similar version of naan that I just made.
It's so desirable and close to the restaurant-style naan, or..if it's not too much, I want to confess that this naan version is far much better than the restaurant or the store bought naan.
I can make extra batches of these and keep them refrigerated.
So whenever we feel like eating them, all we need to do is just reheat them on a pan.

Here, since most of us don't have tandoor available at our home, you can cook your naan in two ways - by oven or stove top method.

I've tried both method but I still prefer to cook my naan on a stove top.

Why I prefer stove top method?

Simply because naan is originally cooked or roasted in a tandoor in a high heat generated by  charcoal or wood fire.
Thus, this method allows direct cooking of food with live fire.
Due to a higher temperature (can be up to 480℃), naan is cooked for a very short period of time.
Oven does not has this capability and when we cook for a longer time in oven with temperature less than 200℃, it will results in dry and your naan will become stiff.
I think the best way to overcome your naan from getting stiff and dry if you prefer to bake it in oven, try to set oven temperature between 220 - 240℃ and do not bake for more than 10 minutes.

But I would still prefer to cook my naan manually, on a stove top in a non-stick pan.
It's quicker and convenient especially for those who doesn't own oven at home.


FLUFFY INDIAN STYLE GARLIC CHEESE NAAN

Adapted From : chefdehome
Cuisine : Indian
Yield : 8


Ingredients:

3 1/3 cups of all purpose flour
1/2 tablespoon of sugar
1 teaspoon of salt
1 tablespoon of garlic powder/3 finely chopped garlic cloves
2 teaspoons of active dry yeast
1 cup of warm water
1/2 cup of fresh/evaporated/almond milk
2 1/2 tablespoons of vegetable/corn/coconut/olive oil
8 sliced cheddar cheese - cut into 4 each (naan filling)
More flour/oil for kneading and rolling naan

Toppings  & Garnish (optional)

Melted butter/ margarine/ghee - for brushing cooked naan
Chopped fresh parsley

Instructions:


Prepare Naan Dough

Manual Way:

In a large bowl, combine warm water, sugar, yeast and milk. 
Wait until it's foamy.
The, add flour, salt, oil and garlic paste/powder.
Knead the dough until a smooth and elastic dough formed (which is about 10 minutes).
If it's too sticky to handle the dough, add in more flour or oil.
The dough should not to wet or dry.
Cover the bowl with a damp towel or cling wrap and let it sit under warm place until it doubled in size.

Using Bread Maker:

Put in all the ingredients (except cheese) in the bread maker bowl and select the menu "Dough."
Wait until it finishes the kneading process which should takes place about 20 minutes.
Lightly oil a large bowl and transfer the dough into the prepared bowl and cover it with a dampt towel or a cling wrap and let it sit for 40 minutes (or more) until it doubled in size.


Shape The Naan

Once the dough doubled in size, punch in the dough and knead for a 1 minute to break the large air bubbles.
Floured your work surface and transfer the dough onto it.
Form a round shape, flatten it a bit and cut into 8 equal portions.
Form a small ball for each portion, cover the dough balls with a damp towel and let them rest for 5 minutes, so it'll be easier to roll the dough later as it won't retract too much.


Cook The Naan


Stove Top: 

Preheat your iron cast skillet or a non-stick pan in a medium heat, lightly oiled the pan.
Take one ball, flatten with a rolling pin (not too thin) and place 4 small pieces of cheddar cheese at the center.
Wrap the cheese neatly and roll it to form a flat, oval or round shape naan.
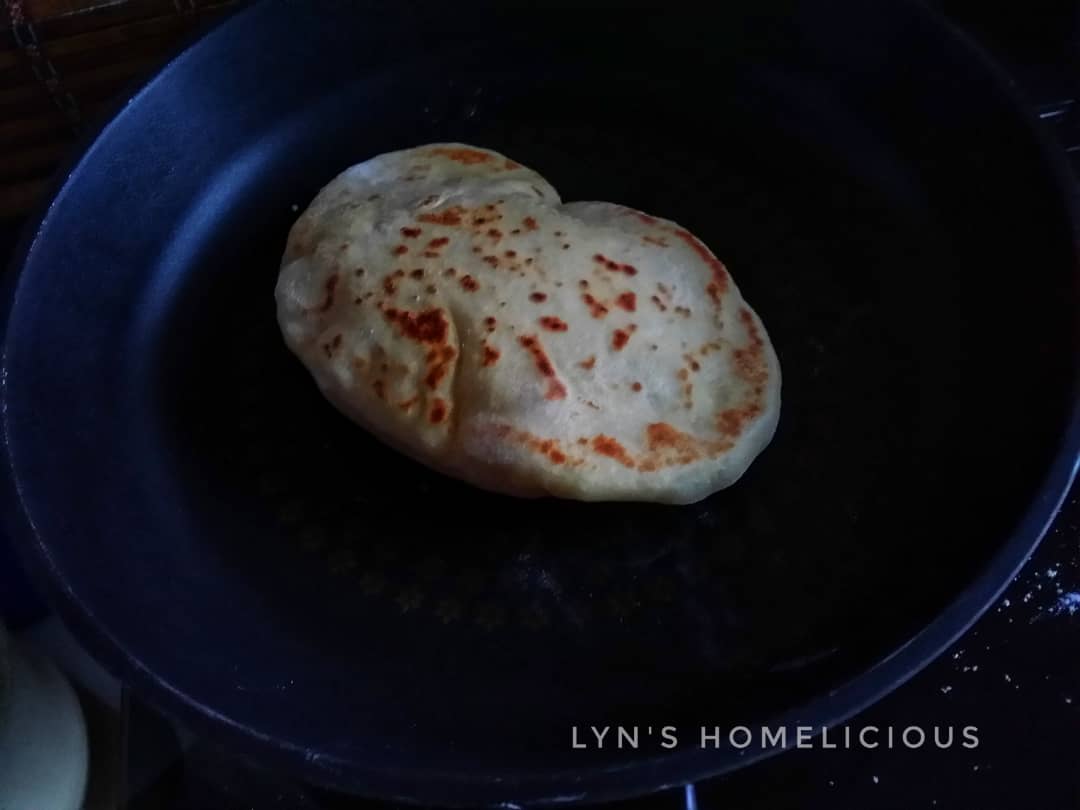
When the pan is hot, place one rolled naan on top and cook until you starts seeing a lot of bubbles form all over the naan's surface, which takes about 2 minutes.
Flip to the other side and cook until you see brown patches appear on the naan's surface.
If necessary, flip one more time to other initial side to brown the skin.
Repeat with the remaining dough balls.
Cover the cooked naan with a towel, or put in a container with cover to prevent it from getting hardened.

Flip the naan to the other sides once you start seeing bubbles formed


Serve The Naan:

Serve the garlic cheese naan warm with your favorite dipping sauce and toppings.
While it's still warm, if you want, you can brush the naan with melted butter or ghee and sprinkle with chopped garlic, parsley or chili flakes or chopped cilantro.
I prefer it plain, as I enjoy it with chickpeas curry and chicken tandoori.


Store The Naan:

If you plan to make ahead your garlic cheese naan, cook your naan halfway, just until the bubbles start to form.
Cool the cooked naan before putting them in an air tight zip lock bag or container and store in refrigerator of freezer until ready to use.


Reheat The Stored Naan

If you freeze your naan in a freezer, you need to defrost it first for 10 to 15 minutes then reheat the naan on a stove top or oven until it turns soft and fluffy again.